RsyncUI requires passwordless SSH key authentication to synchronize to remote servers. These pages guide you through creating SSH keys and configuring RsyncUI to use them.
1 - SSH settings
After changing a setting, save the changes to keep them next time you use RsyncUI.
This view configures the global SSH keypath and identity file used by RsyncUI for all remote tasks. For a guide on creating SSH keys, see SSH keys and passwordless login.
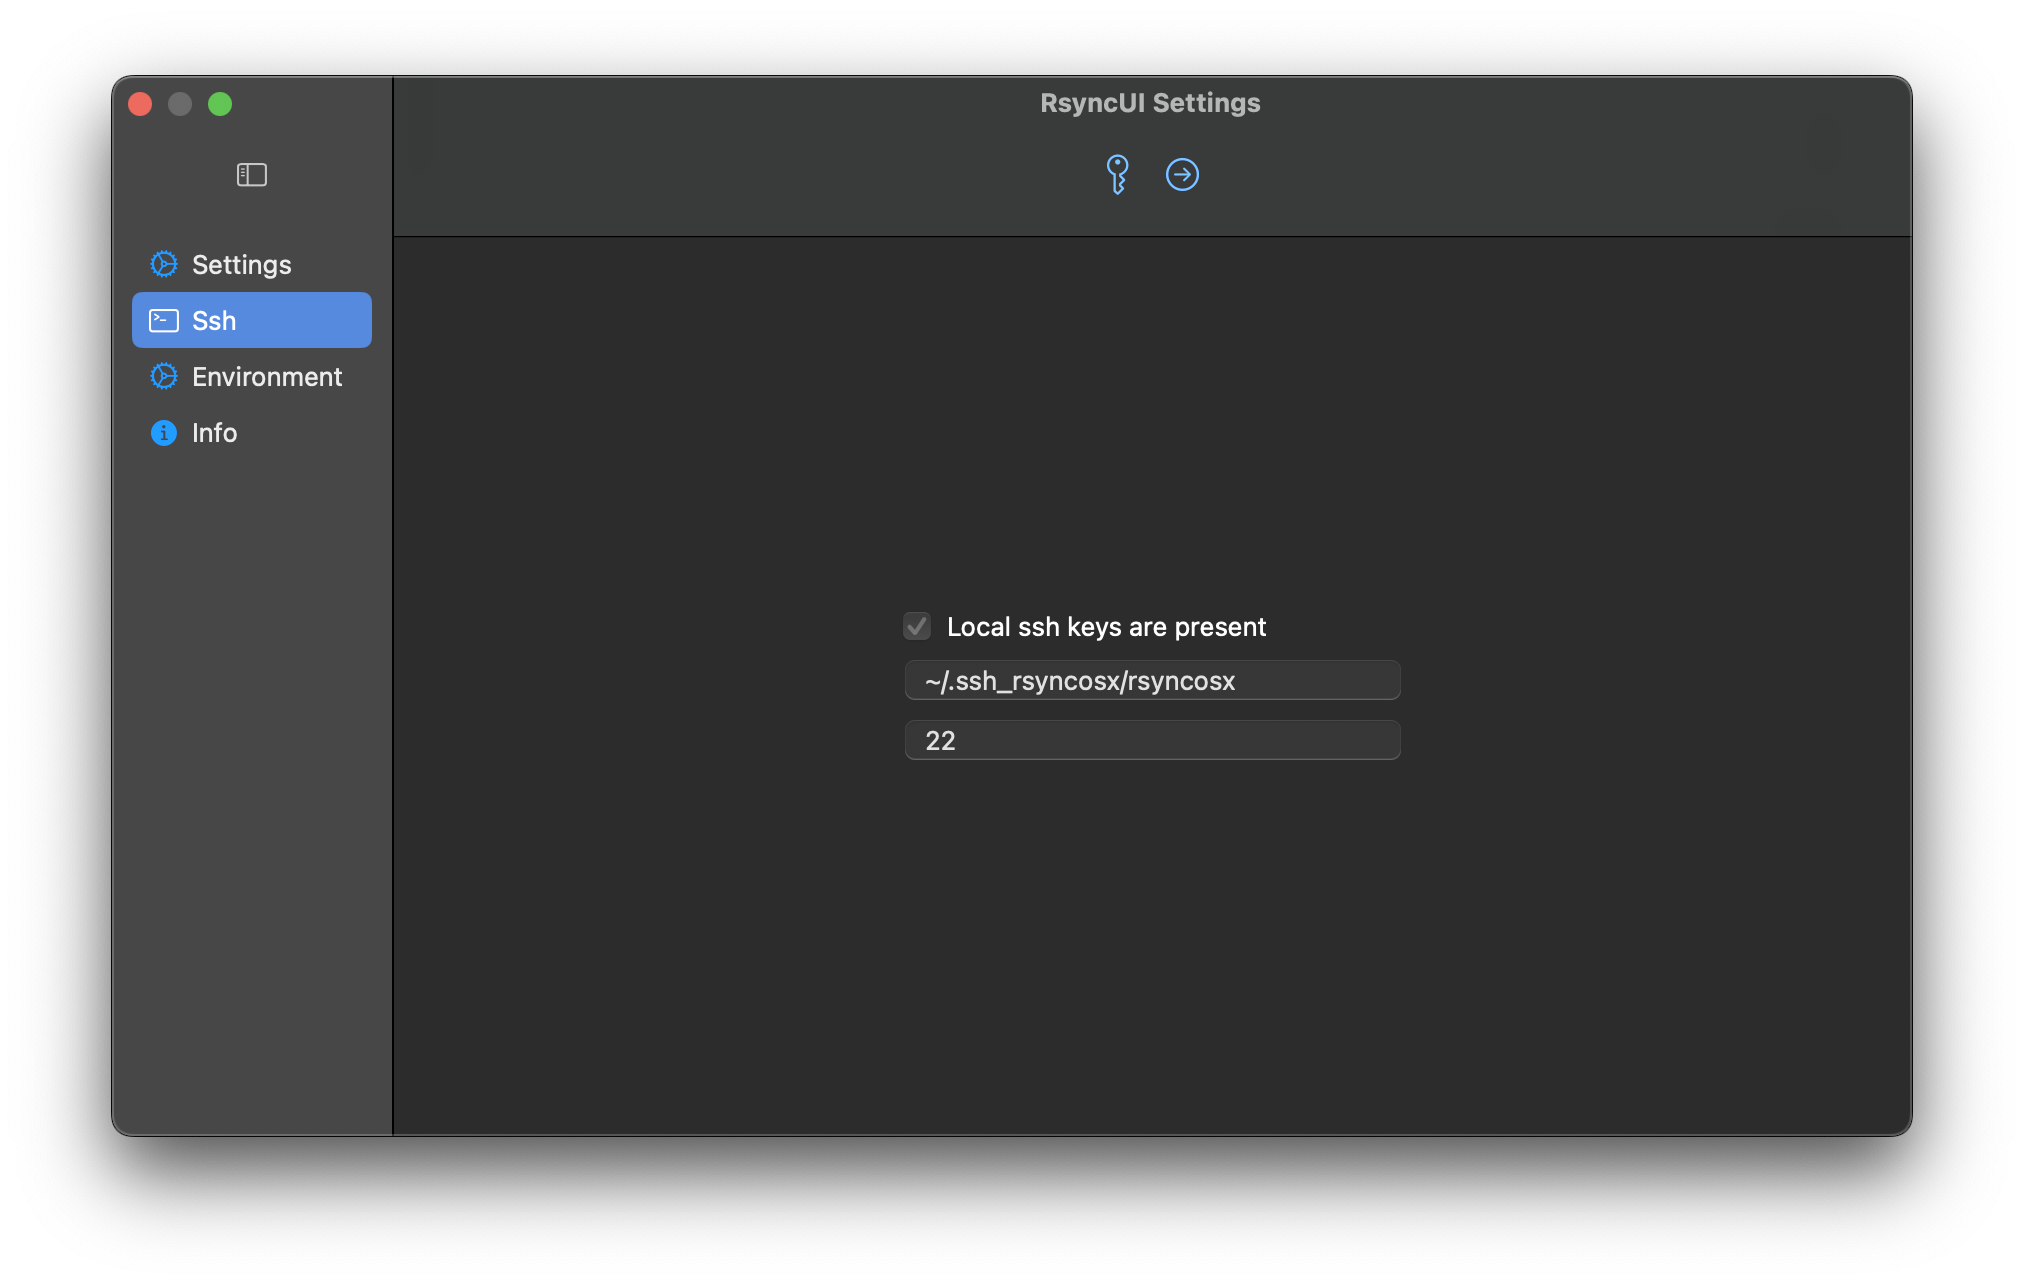
Local SSH Key Present
When this is “on”, RsyncUI has detected a local SSH key.
The default RSA-based SSH key values are ~/.ssh/id_rsa and port 22. These are not required if you use the defaults. If you do not specify your own keypath and identity file, RsyncUI uses the defaults. If a local SSH key is present, leave the settings as-is or set your own keypath and identity file. RsyncUI will mark the selected settings as default.
Set SSH Keypath and Identityfile
The user can specify a selected SSH keypath and identityfile that will apply to all configurations.
- SSH Keypath and Identityfile: If the user selects a different keypath or identityfile from the default, it will be used for all configurations.
- Port Number: The user can specify the port number through which SSH communicates. The default port number is
22.
If global SSH parameters are set, they will apply to all configurations. However, it is possible to specify different SSH parameters for individual tasks, which will override the global settings.
2 - SSH keys and passwordless login
To synchronize to a remote server, RsyncUI requires passwordless SSH key authentication. Password-based authentication is not supported. SSH keys are more secure than passwords and allow RsyncUI to run unattended tasks without prompting.
Default SSH keys
If you use the standard RSA key location (~/.ssh/id_rsa) and the default port 22, no extra configuration is needed in RsyncUI. RsyncUI detects the key automatically and appends -e ssh to the rsync command to tunnel and encrypt the transfer.
Custom SSH keys
If you prefer a non-default key location or a custom port, you must create the key pair manually and tell RsyncUI where to find it.
RsyncUI passes custom key settings to rsync as:
-e "ssh -i ~/.keypath/identityfile -p NN"
where:
-i ~/.keypath/identityfileis the SSH keypath and identity file-p NNis the port number (default 22)
Custom keypaths must start with ~ followed by / and contain at least two forward slashes. RsyncUI validates this before saving.
For example, a custom keypath might look like:
~/.ssh_rsyncosx/rsyncosx
And the resulting rsync command RsyncUI builds would be:
/opt/homebrew/bin/rsync --archive --verbose --compress \
-e "ssh -i ~/.ssh_rsyncosx/rsyncosx -p 22" --stats \
/Users/thomas/Documents/ thomas@raspberrypi:/backups/Documents/
Step-by-step: creating a custom SSH key pair
RsyncUI uses the standard tools ssh-keygen and ssh-copy-id. Run the following steps in Terminal.
Custom SSH key pairs must follow the format ~/.ssh_keypath/identityfile, and the SSH port must be an integer value. RsyncUI validates these settings before saving.
Step 1: Create the SSH directory
cd
mkdir .ssh_rsyncosx
Step 2: Generate the key pair
ssh-keygen -t rsa -N "" -f ~/.ssh_rsyncosx/rsyncosx
Parameters explained:
-t rsa— creates an RSA key pair-N ""— sets no passphrase-f ~/.ssh_rsyncosx/rsyncosx— specifies where to save the keys
Step 3: Copy the public key to the remote server
ssh-copy-id -i ~/.ssh_rsyncosx/rsyncosx.pub -p NN user@server
Replace NN with your SSH port (default 22), user with your remote username, and server with your server address.
Step 4: Set correct permissions
chmod 700 ~/.ssh_rsyncosx
Step 5: Verify the connection
/usr/bin/ssh -p NN -i ~/.ssh_rsyncosx/rsyncosx user@server
A successful login confirms the key pair is working. If it fails, check that ssh-copy-id completed without errors and that the permissions on ~/.ssh_rsyncosx are correct.
Step 6: Configure RsyncUI
Open Settings → SSH and enter your custom keypath and identity file. RsyncUI will apply these settings to all remote tasks. You can also set per-task SSH parameters in the task’s Parameters tab, which will override the global setting.