Documentation for RsyncUI’s main features including synchronization, snapshots, restore, profiles, scheduling, quick tasks, and rsync parameters.
This is the multi-page printable view of this section. Click here to print.
Core Features
- 1: Synchronize data
- 2: Snapshots
- 3: Parameters to rsync
- 4: Schedule
- 5: Profiles
- 6: QuickTask
- 7: Restore data
1 - Synchronize data
The Synchronize view runs all or selected tasks in a single operation via shortcut actions or toolbar functions.
For a single task, the first double-click initiates a --dry-run estimate; a second double-click executes the actual run.
Shortcut actions within the Synchronize view:
- estimate - shortcut
⌘Eestimates all or selected tasks - synchronize - shortcut
⌘Rsynchronizes all or selected tasks without estimation- no progress bar during synchronization; a progress bar requires estimation first
- abort - shortcut
⌘Kaborts and halts any ongoing task
RsyncUI opens the Synchronize view at launch. Click the wand and stars (shortcut ⌘E) on the toolbar to estimate all tasks.
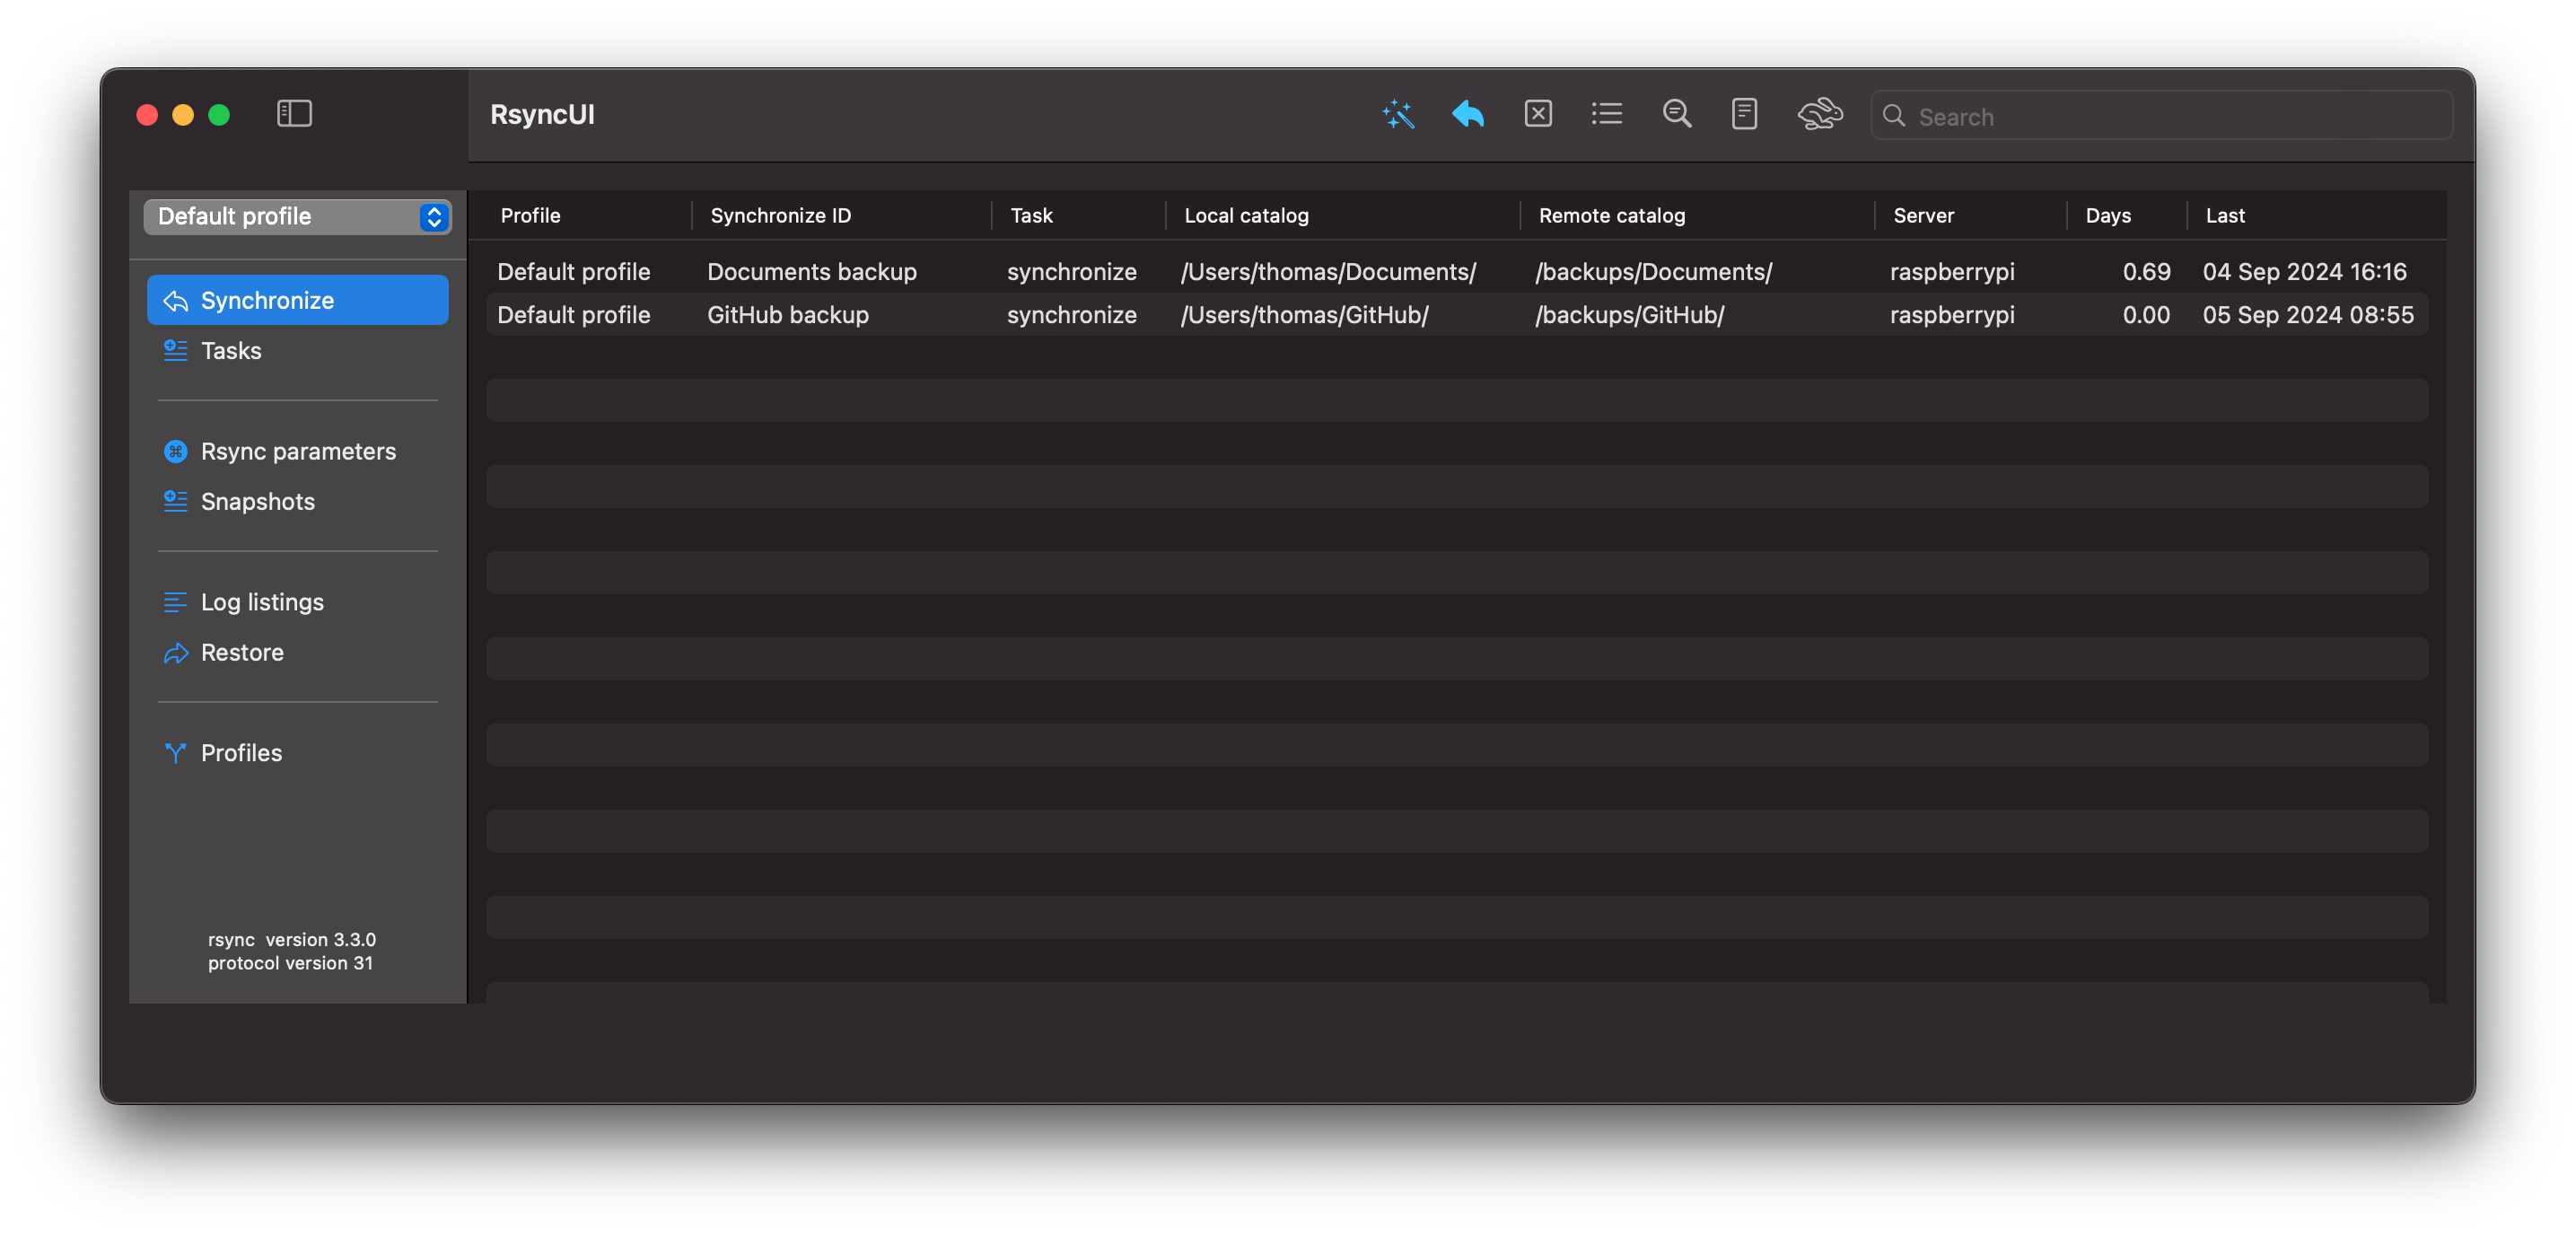
The estimate displays with blue numbers indicating data to be synchronized. To synchronize from the summarized estimate view, press the left arrow (shortcut ⌘R) on the toolbar.
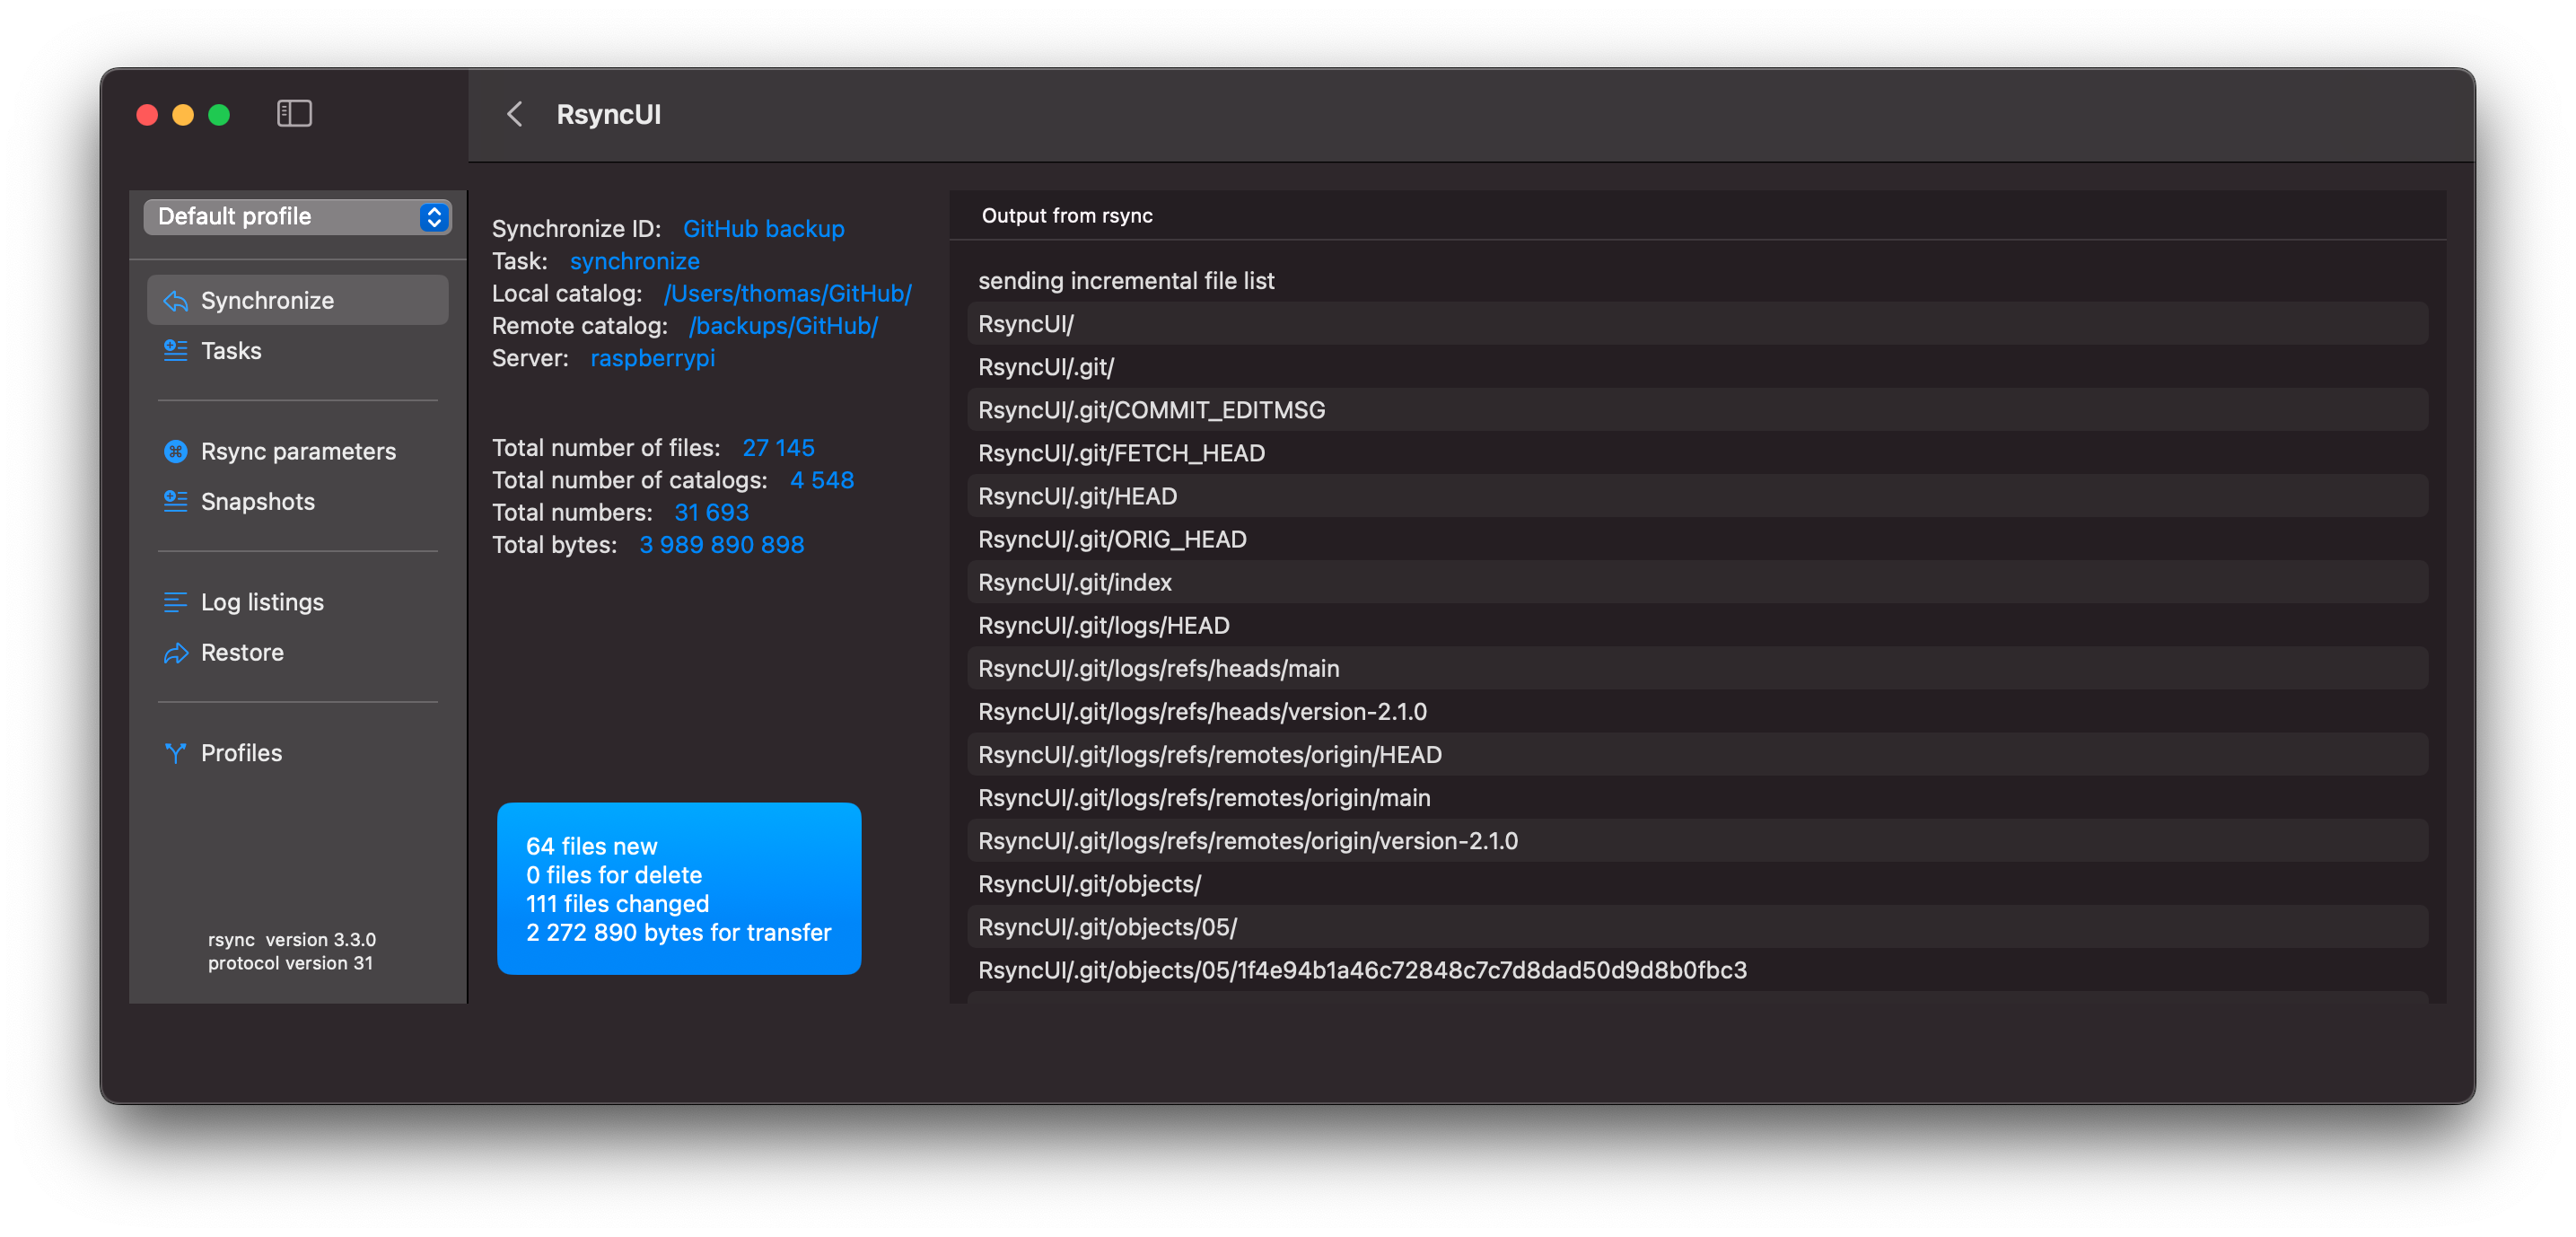
By selecting a row within the estimate view, you will be presented with detailed information about that task.

The output from rsync is as follows due to the addition of parameters to rsync. Refer to the blog post titled “Verify Remote” for further details. The parameters cause rsync to output more data.
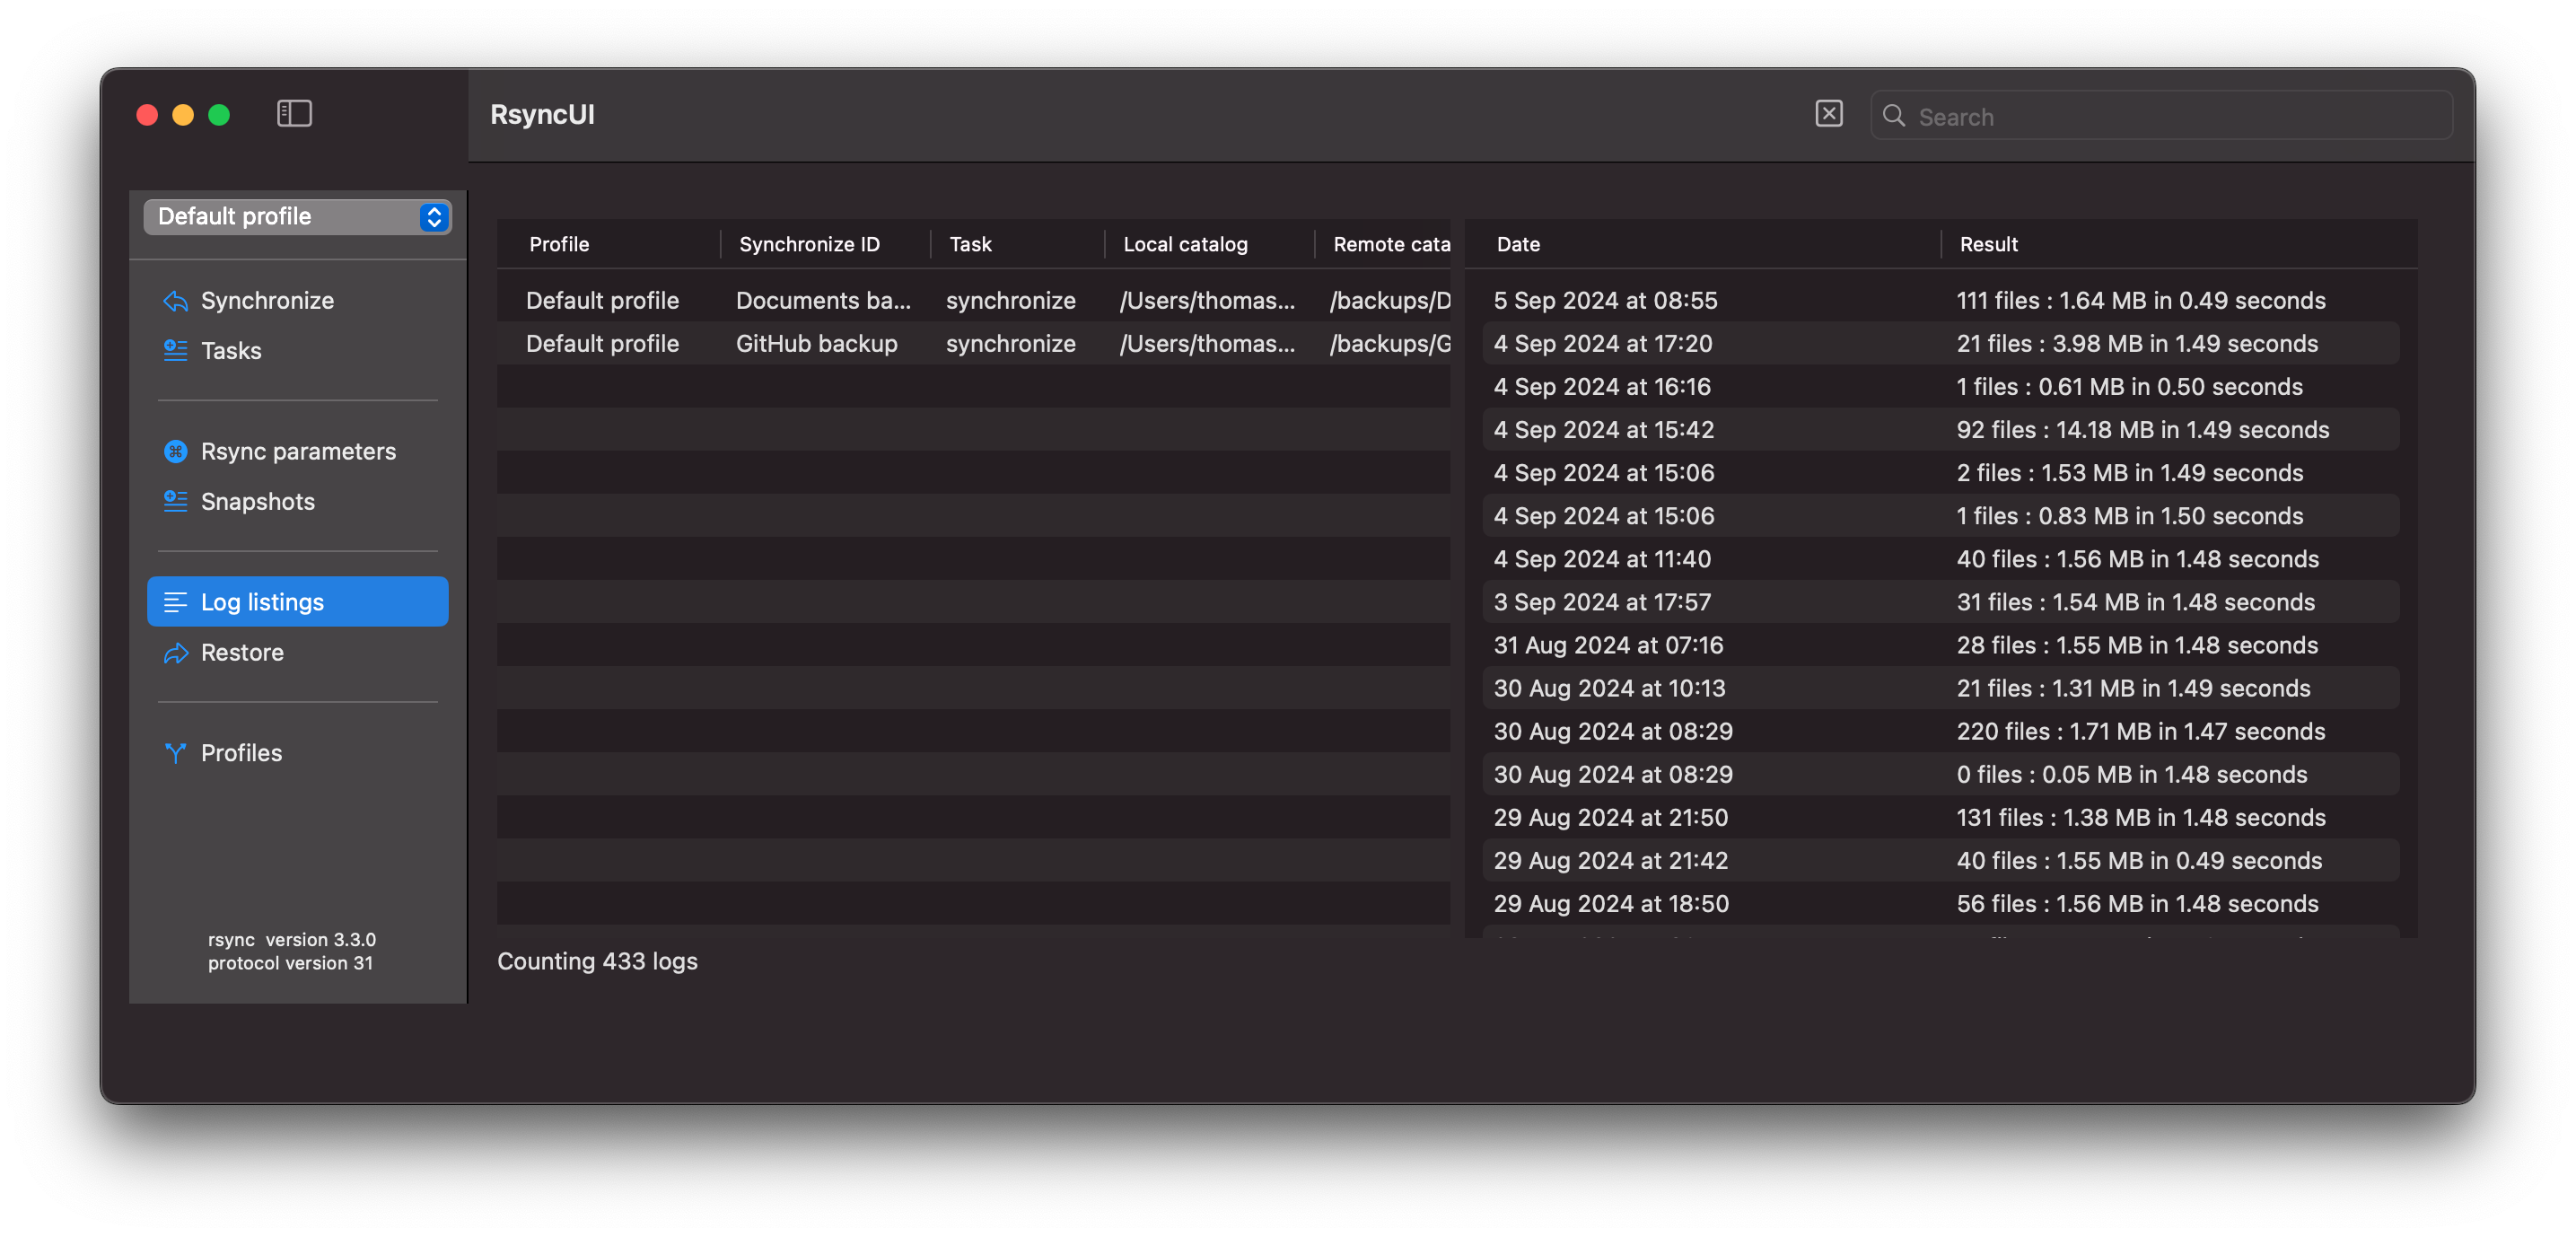
After execution, the logs are updated.
2 - Snapshots
Snapshots are an effective way to restore previous data and deleted files. They use hardlinks to save copies of only modified and deleted files. Unchanged files remain as hardlinks to the original.
In each snapshot task, RsyncUI stores the next snapshot number. The number increments by one after each run. Rsync automatically creates the next snapshot directory, and RsyncUI updates the stored number. The number is displayed as part of the log timestamp.
If a file named “file.txt” is saved in the initial snapshot and remains unchanged or is deleted, the “file.txt” in the latest snapshot is a hardlink to the original file in the first snapshot.
If “file.txt” is deleted from the source, the filesystem manages the hardlink appropriately during the delete operation.
In RsyncUI, the first and last snapshots are never deleted, even if all snapshots are marked for deletion.
Snapshots
A snapshot is a saved state or backup of data at a specific point in time. Each snapshot is synchronized with the source at the time of creation.
Remote Server
The rsync parameter for the next snapshot to synchronize to a remote.server is:
--link-dest=~/snapshots/n-1 /Users/thomas/data/ user@remote.server:~/snapshots/n
where:
nis the number of the next snapshot to be synchronizedn-1is the latest synchronized snapshot/Users/thomas/data/is the source directory, only read by rsync~/snapshots/is the destination directory where snapshots are synchronized
Local Attached Disk
The above example with a local attached disk, mounted at /Volumes/backup, is:
--link-dest=/Volumes/backup/snapshots/n-1 /Users/thomas/data/ /Volumes/backup/snapshots/n
where:
nis the number of the next snapshot to be synchronizedn-1is the latest synchronized snapshot/Users/thomas/data/is the source directory, only read by rsync/Volumes/backup/snapshots/is the destination directory where snapshots are synchronized
Snapshot Creation
To create a snapshot task, select “snapshot” as the action in the Add tasks section. RsyncUI automatically manages the snapshot number “n” for the task. This number represents the next available snapshot number and is used to calculate the rsync parameter.
Snapshot Administration
Snapshot administration is essential for maintaining an organized and efficient backup system. It involves regularly reviewing and deleting unnecessary or outdated snapshots to prevent clutter and optimize backup space usage.
Deleting Snapshots
Deleting snapshots is a destructive operation that should be performed with caution. It is important to have a plan in place to determine which snapshots to keep and which to delete. RsyncUI provides a simple plan for managing snapshot retention.
The Plan for Keep and Delete
Selecting the “Tag” button evaluates all snapshots based on the date within the log record. Based on the selected plan and date, snapshots are either tagged with “keep” or “delete.” Snapshots tagged with “delete” are also preselected for deletion. To delete the marked snapshots, select the “Delete” button.
Even if all snapshots are tagged for deletion, the first and last snapshots are never deleted. They are automatically removed from the delete list during the internal preparation for deletion.
The plan is based on three time periods, where the plan parameter affects previous months (and years):
The current week
- keep all snapshots within the current week
- the value of
planhas no effect on the current week
The current month (minus the current week)
- keep all snapshots for the selected day of week, e.g., all snapshots every Sunday this month
- the value of
planhas no effect on the current month
Previous months (and years)
- keep the snapshot in the last week of the month for the selected day of week, e.g., the last Sunday in the month
- if
plan == Every, keep snapshots for the selected day of week, e.g., all snapshots every Sunday in previous periods - if
plan == Last, keep snapshots for the selected day of week, e.g., all snapshots on the last Sunday of every month in previous periods
Tagging and Deleting Snapshots
It is recommended to optimize the number of snapshots regularly. Select a plan, tag the snapshots, and delete the snapshots marked for deletion.
3 - Parameters to rsync
RsyncUI provides sensible defaults for synchronization. The defaults applied to a task depend on whether rsync runs over a network or to a local disk.
You can adjust the defaults. Task configurations store their parameters, including any task-specific SSH option, which overrides the global SSH setting.
Always verify the result after changing rsync parameters. Select “Verify tasks” from the Sidebar.
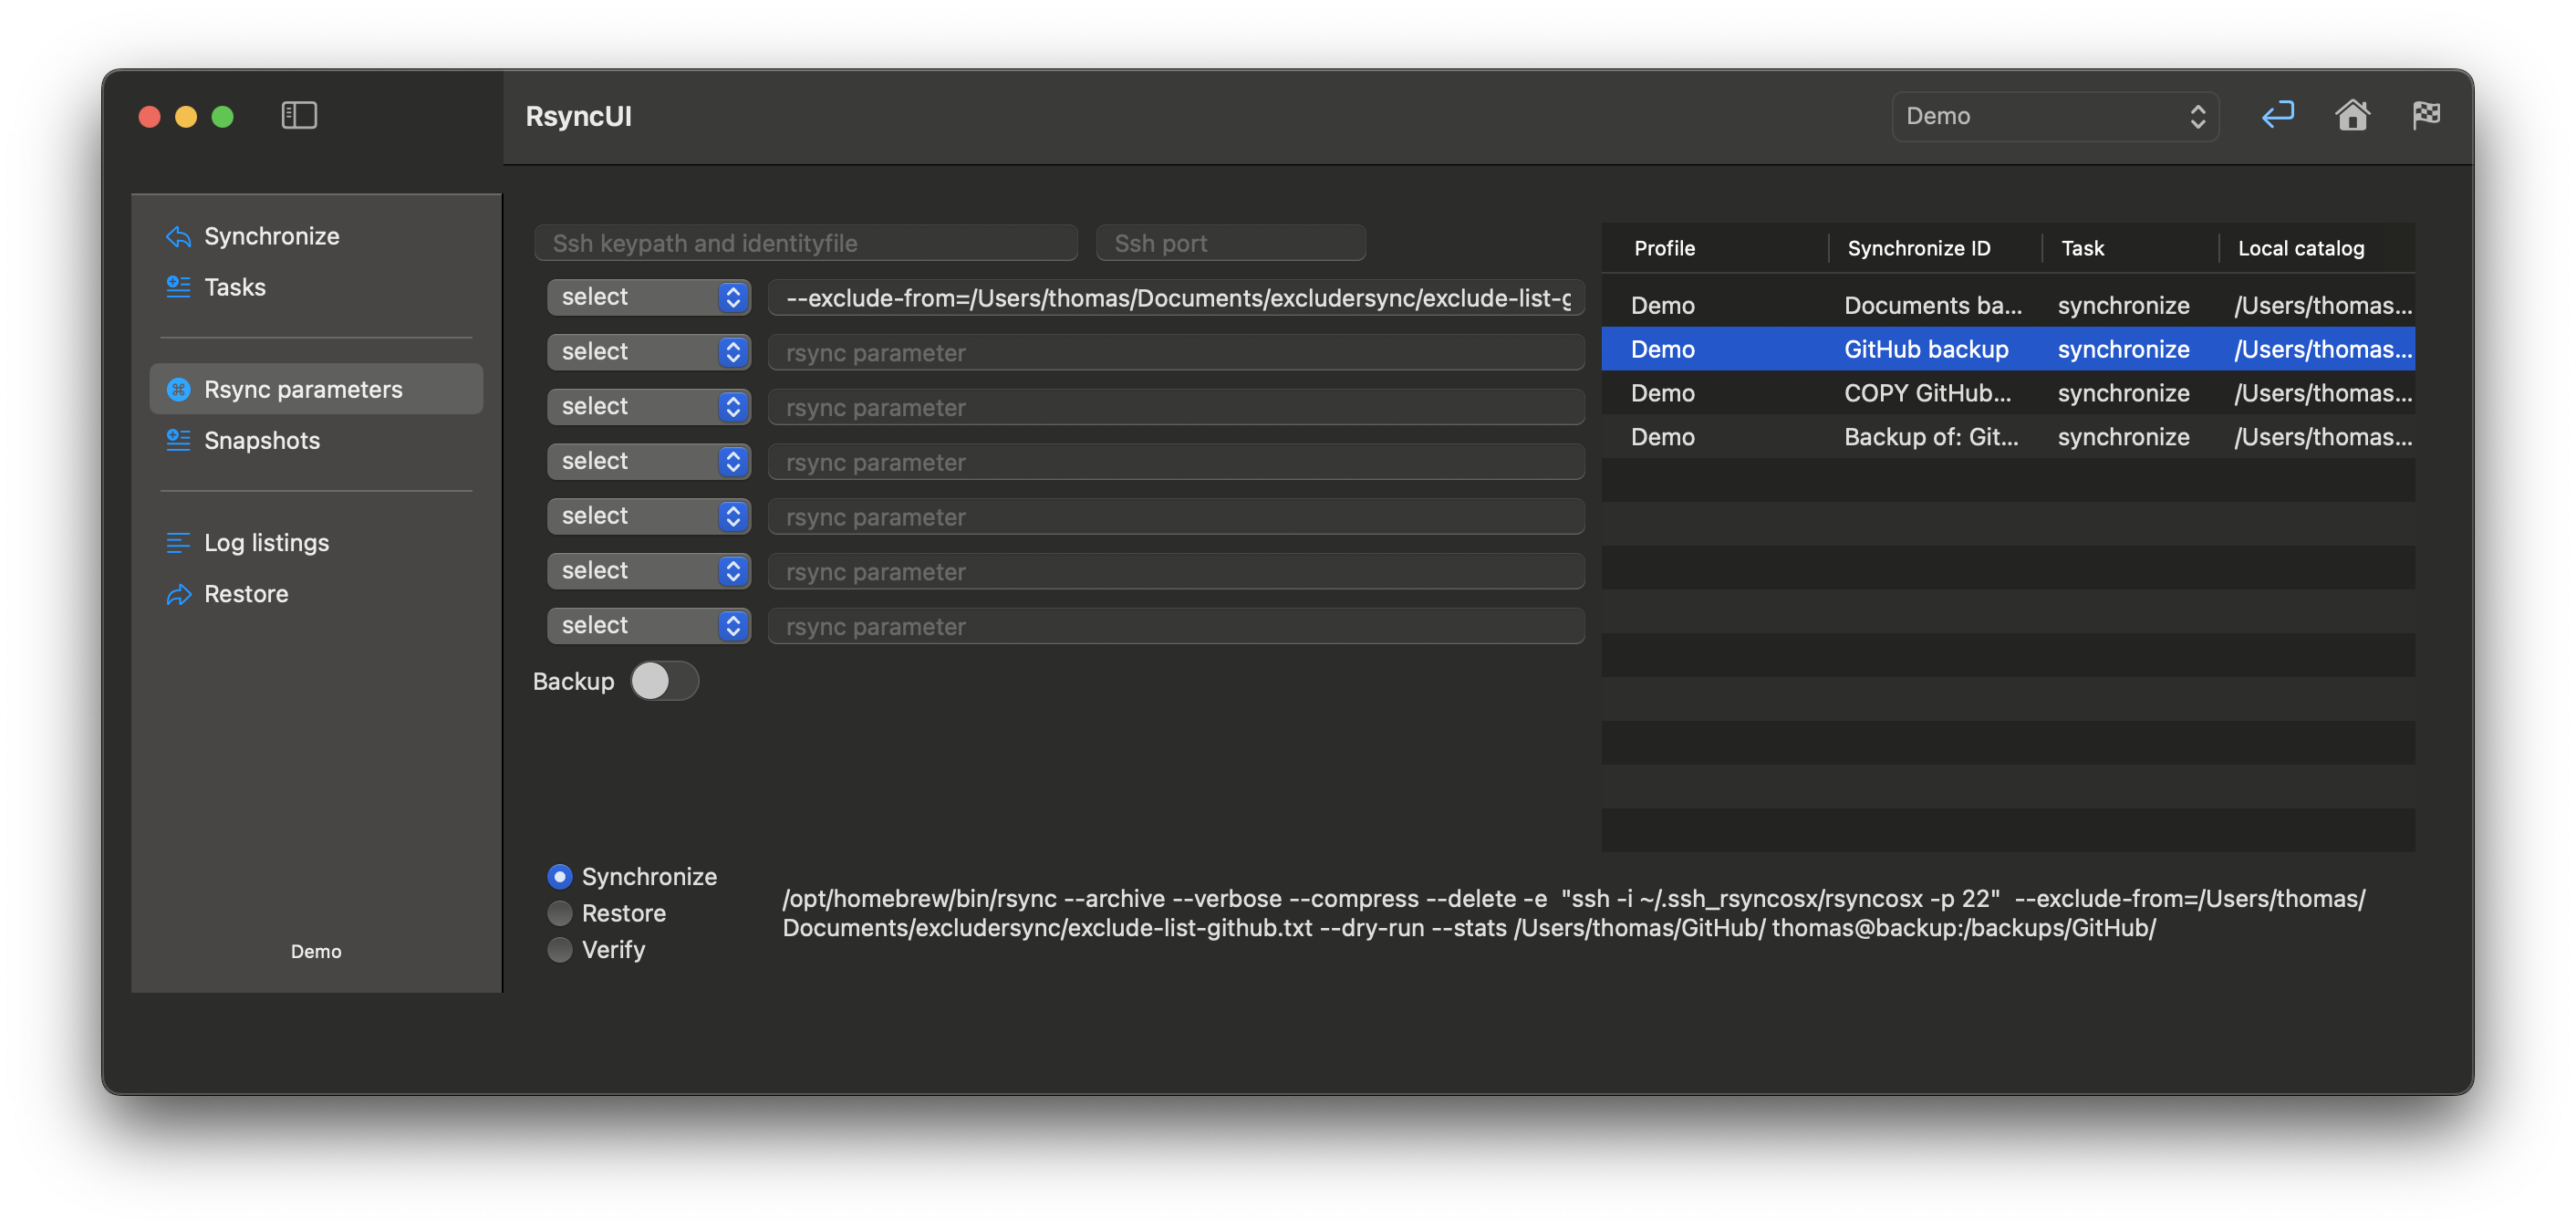
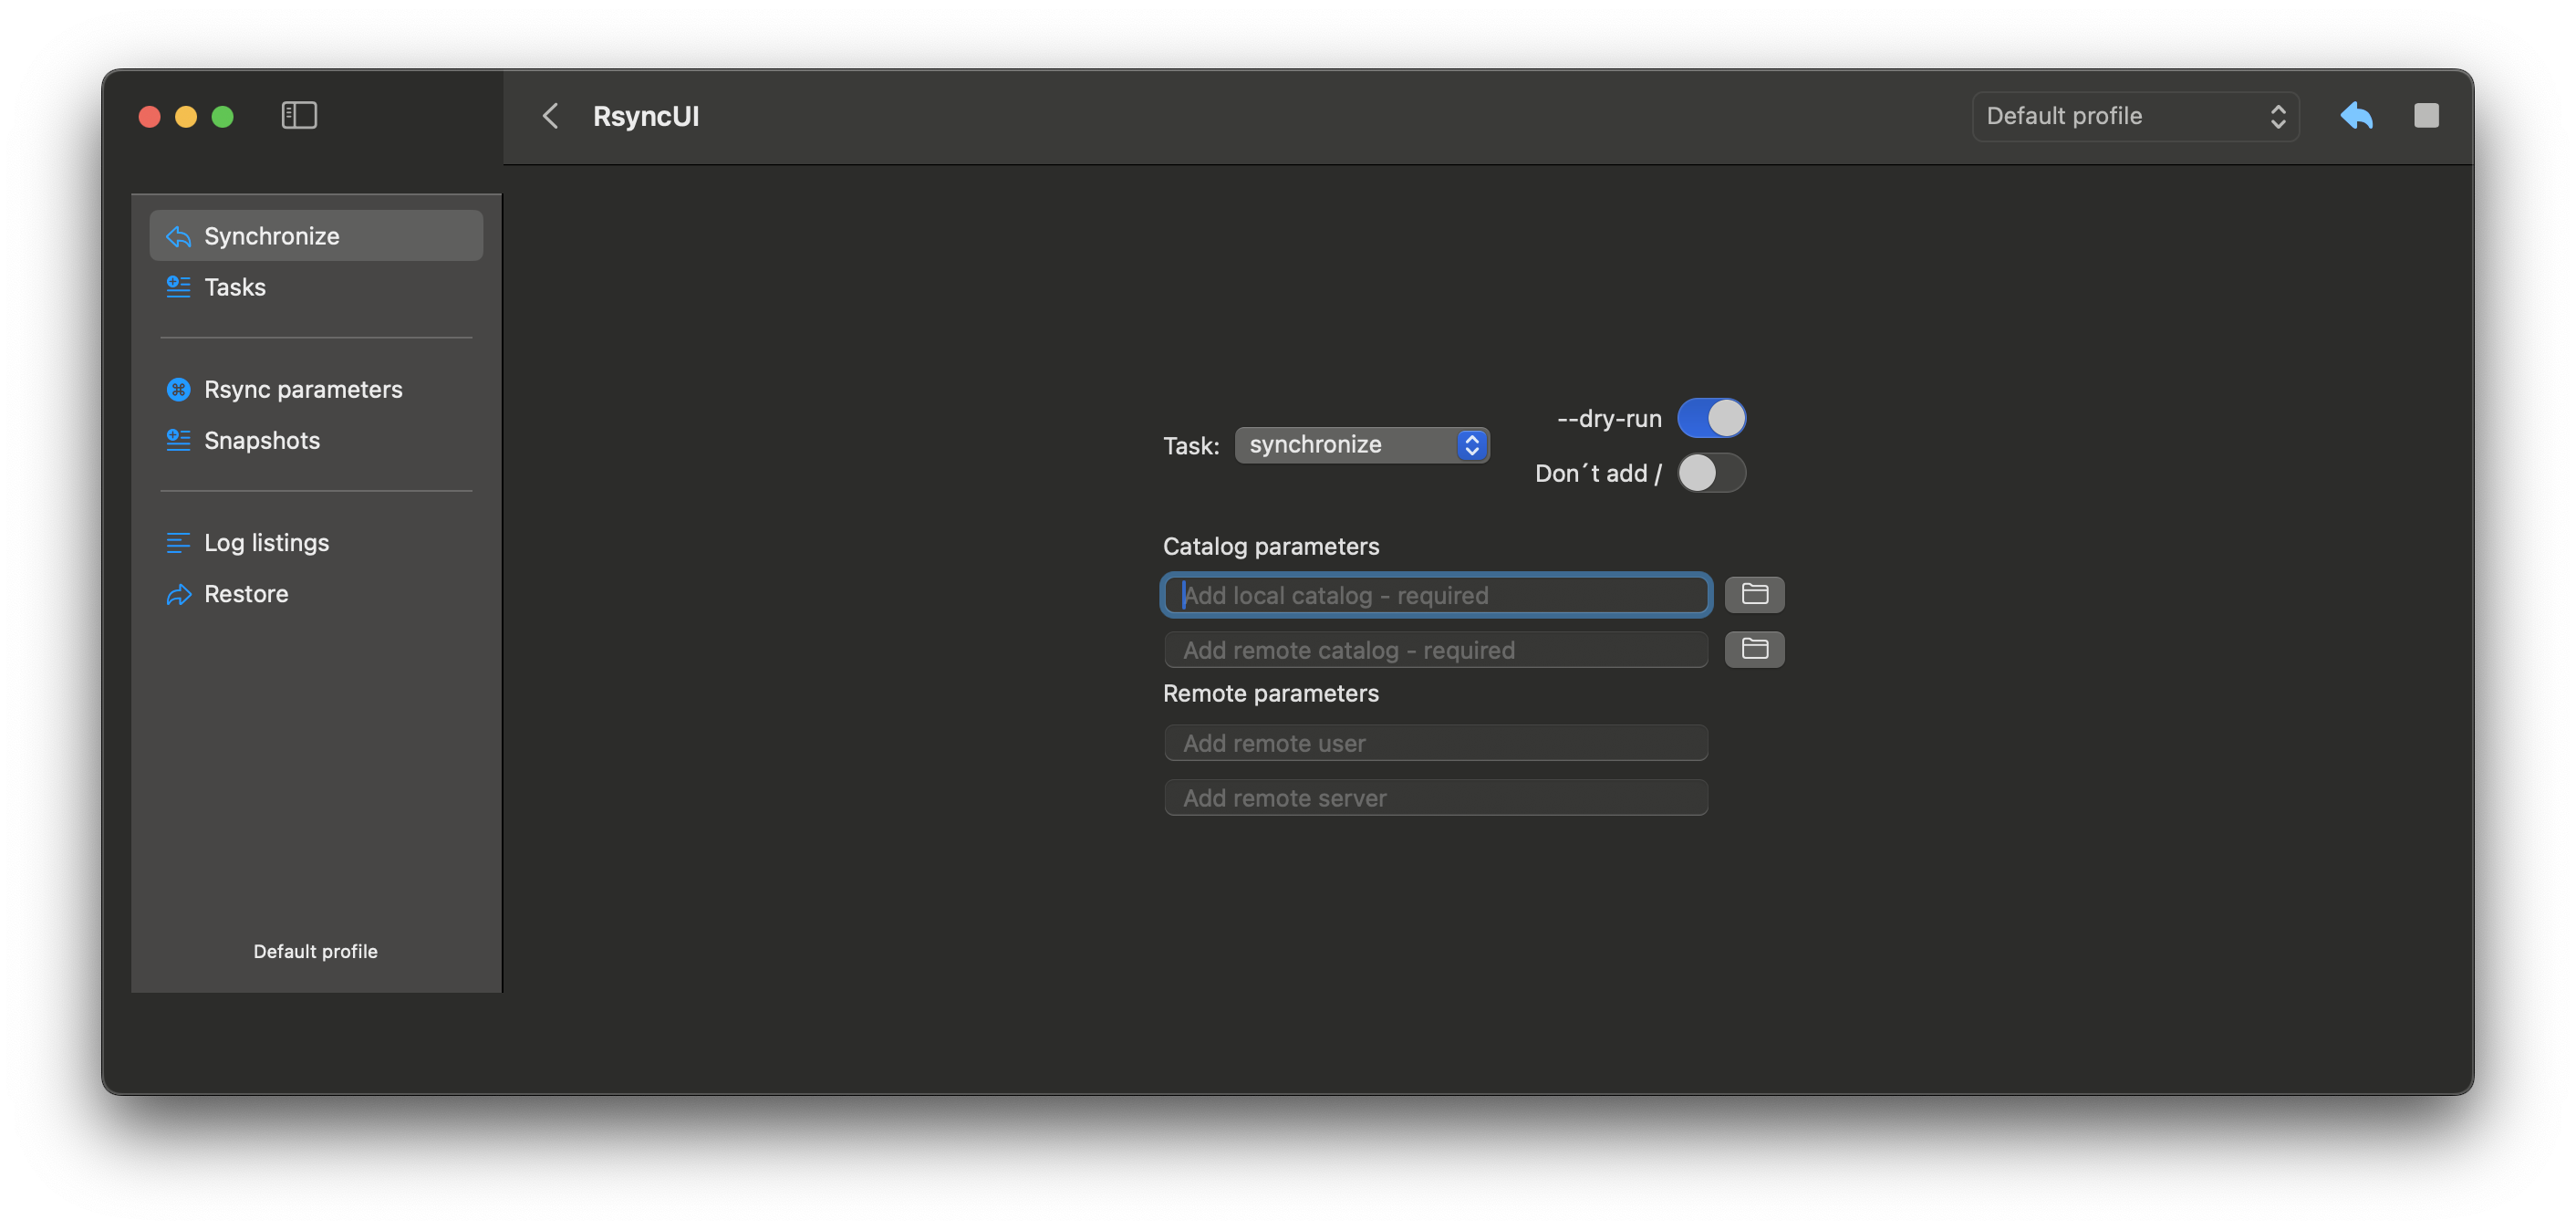
Task-Specific Parameters to rsync
To add a parameter, enter it in a field. RsyncUI supports seven user-defined parameters across the fields. You are responsible for correctness—invalid values will cause rsync errors.
Parameters to rsync are typically constructed as follows (examples only—rsync supports many options):
- parameter=value
--exclude-from=/Volumes/home/user/exclude-list.txt- exclude list for rsync
- parameters only
--stats- enables the display of statistics during the synchronization process--dry-run- executes a simulated synchronization without modifying the files
For a comprehensive list of parameters for rsync, please refer to the official rsync documentation.
Task-Specific SSH Parameter
If you use default SSH keys and no custom SSH settings are configured in RsyncUI, the parameter -e ssh is appended so data is tunneled and encrypted. This applies only to remote tasks and restores.
Task-specific SSH parameters override global SSH settings.
- ssh-port: specify if ssh uses a port other than the default port 22
- ssh-keypath and identity file: typically, these are
.ssh/id_rsa; set only if alternative ssh-keypath and identity file are to be used by ssh
The values are marked red until validated OK. Refer to the “Tools passwordless login” section for information about validated values.
Backup Switch
The rsync command allows you to instruct it to save modified and deleted files in a separate backup directory prior to the synchronization process. This feature can be enabled by setting the following parameters:
--backup- Enables saving modified files--backup-dir- Directory where modified or deleted files are saved before synchronization
RsyncUI provides a default value for this parameter, but you can customize it as needed. For a synchronized directory named <directory to synchronize>, the default backup directory is ../backup_<directory to synchronize>, which is relative to the synchronized directory.
4 - Schedule
The schedule function is disabled by default. Please refer to the RsyncUI settings, Monitor and log section to enable it.
Schedules are saved automatically. RsyncUI loads tasks that are due. Tasks scheduled while the Mac was shut down are not loaded. If the Mac sleeps, missed tasks appear in the Schedule view. Missed tasks do not run automatically.
The scheduler uses the Timer library. According to Apple: “A timer that fires after a certain time interval has elapsed, sending a specified message to a target object.” The timer has a strong reference to the run loop on the main thread. If the app goes to sleep, so does the run loop. The timer is active only while RsyncUI is running.
If the Mac sleeps before scheduled tasks execute, they will appear in the Schedule view.
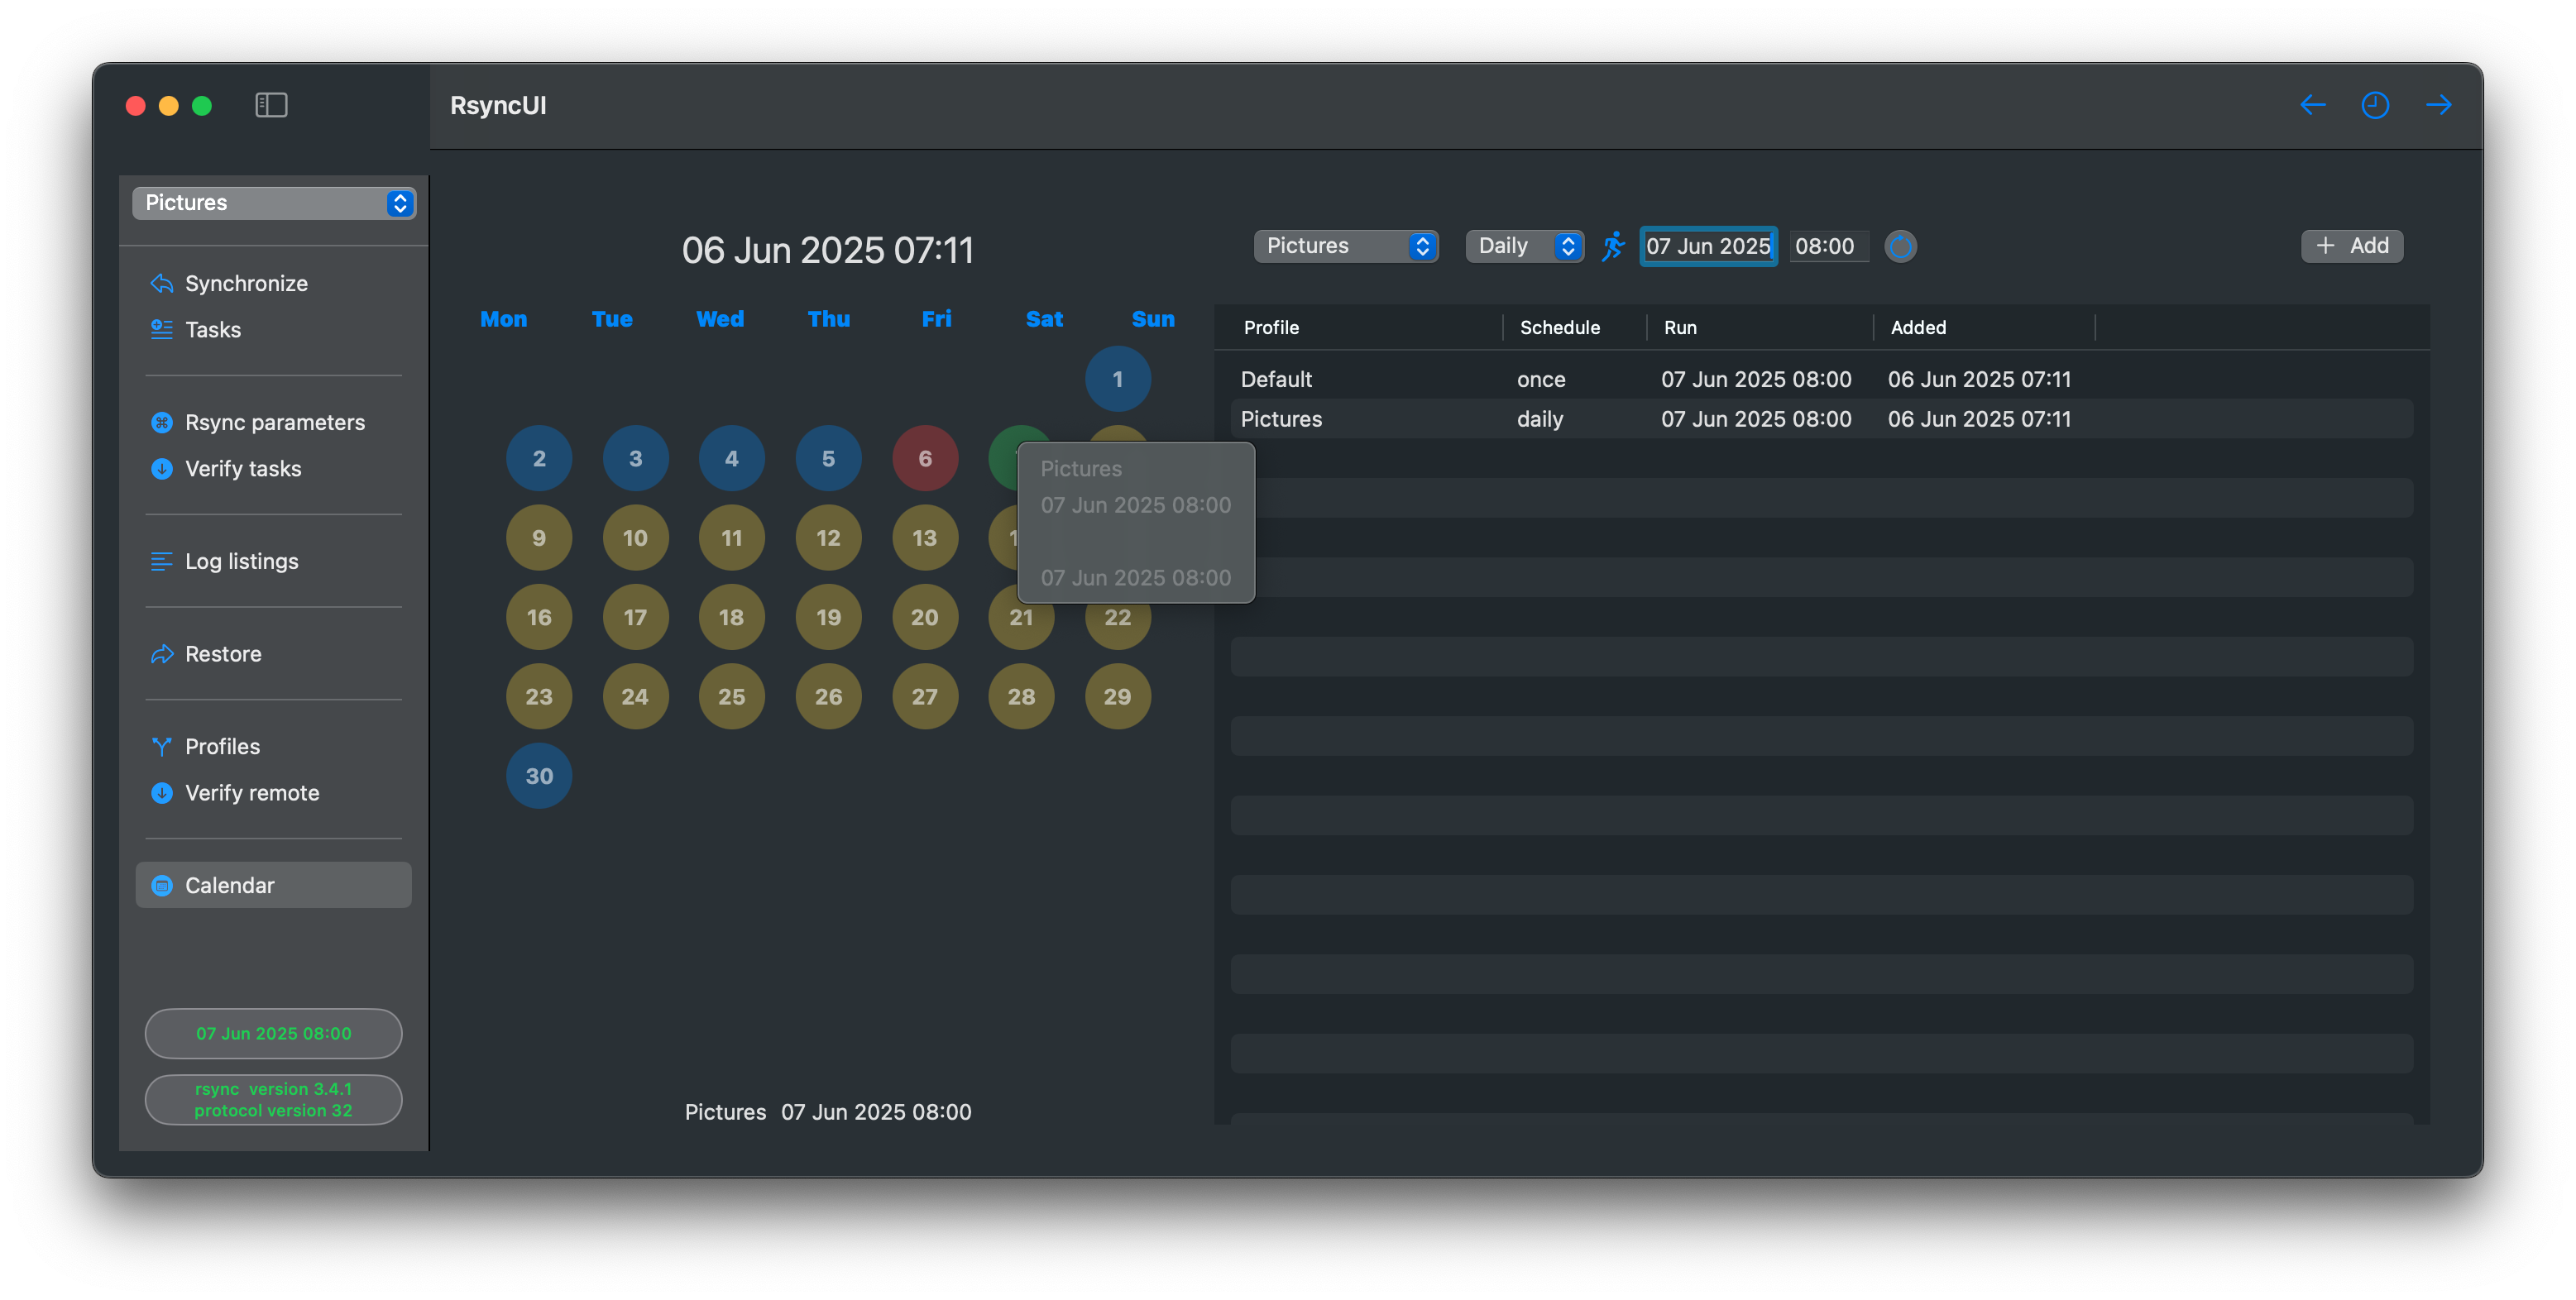
Add Schedule
To add a schedule, click on the date, set the time, and schedule the task. When a schedule is active, the user is notified in the sidebar or on the toolbar when the sidebar is hidden. Right-clicking on a date will present schedules by date.
Tasks added to the schedule are validated. The planned next task schedule must either:
- be at least 10 minutes after the first schedule in queue
- the first schedule in queue is always later than the current time
- be within 10 minutes before the first schedule in queue
- the planned next schedule must also be later than the current time
The Schedule function is designed to handle Mac sleep mode:
- when a scheduled task is not executed because the Mac enters sleep mode, the Schedule function retrieves missed tasks and displays them in a table
- the user can move the missed tasks back to the schedule table
The Schedule view visually distinguishes invalid times in red font. Only validated task schedules are incorporated into the schedule.
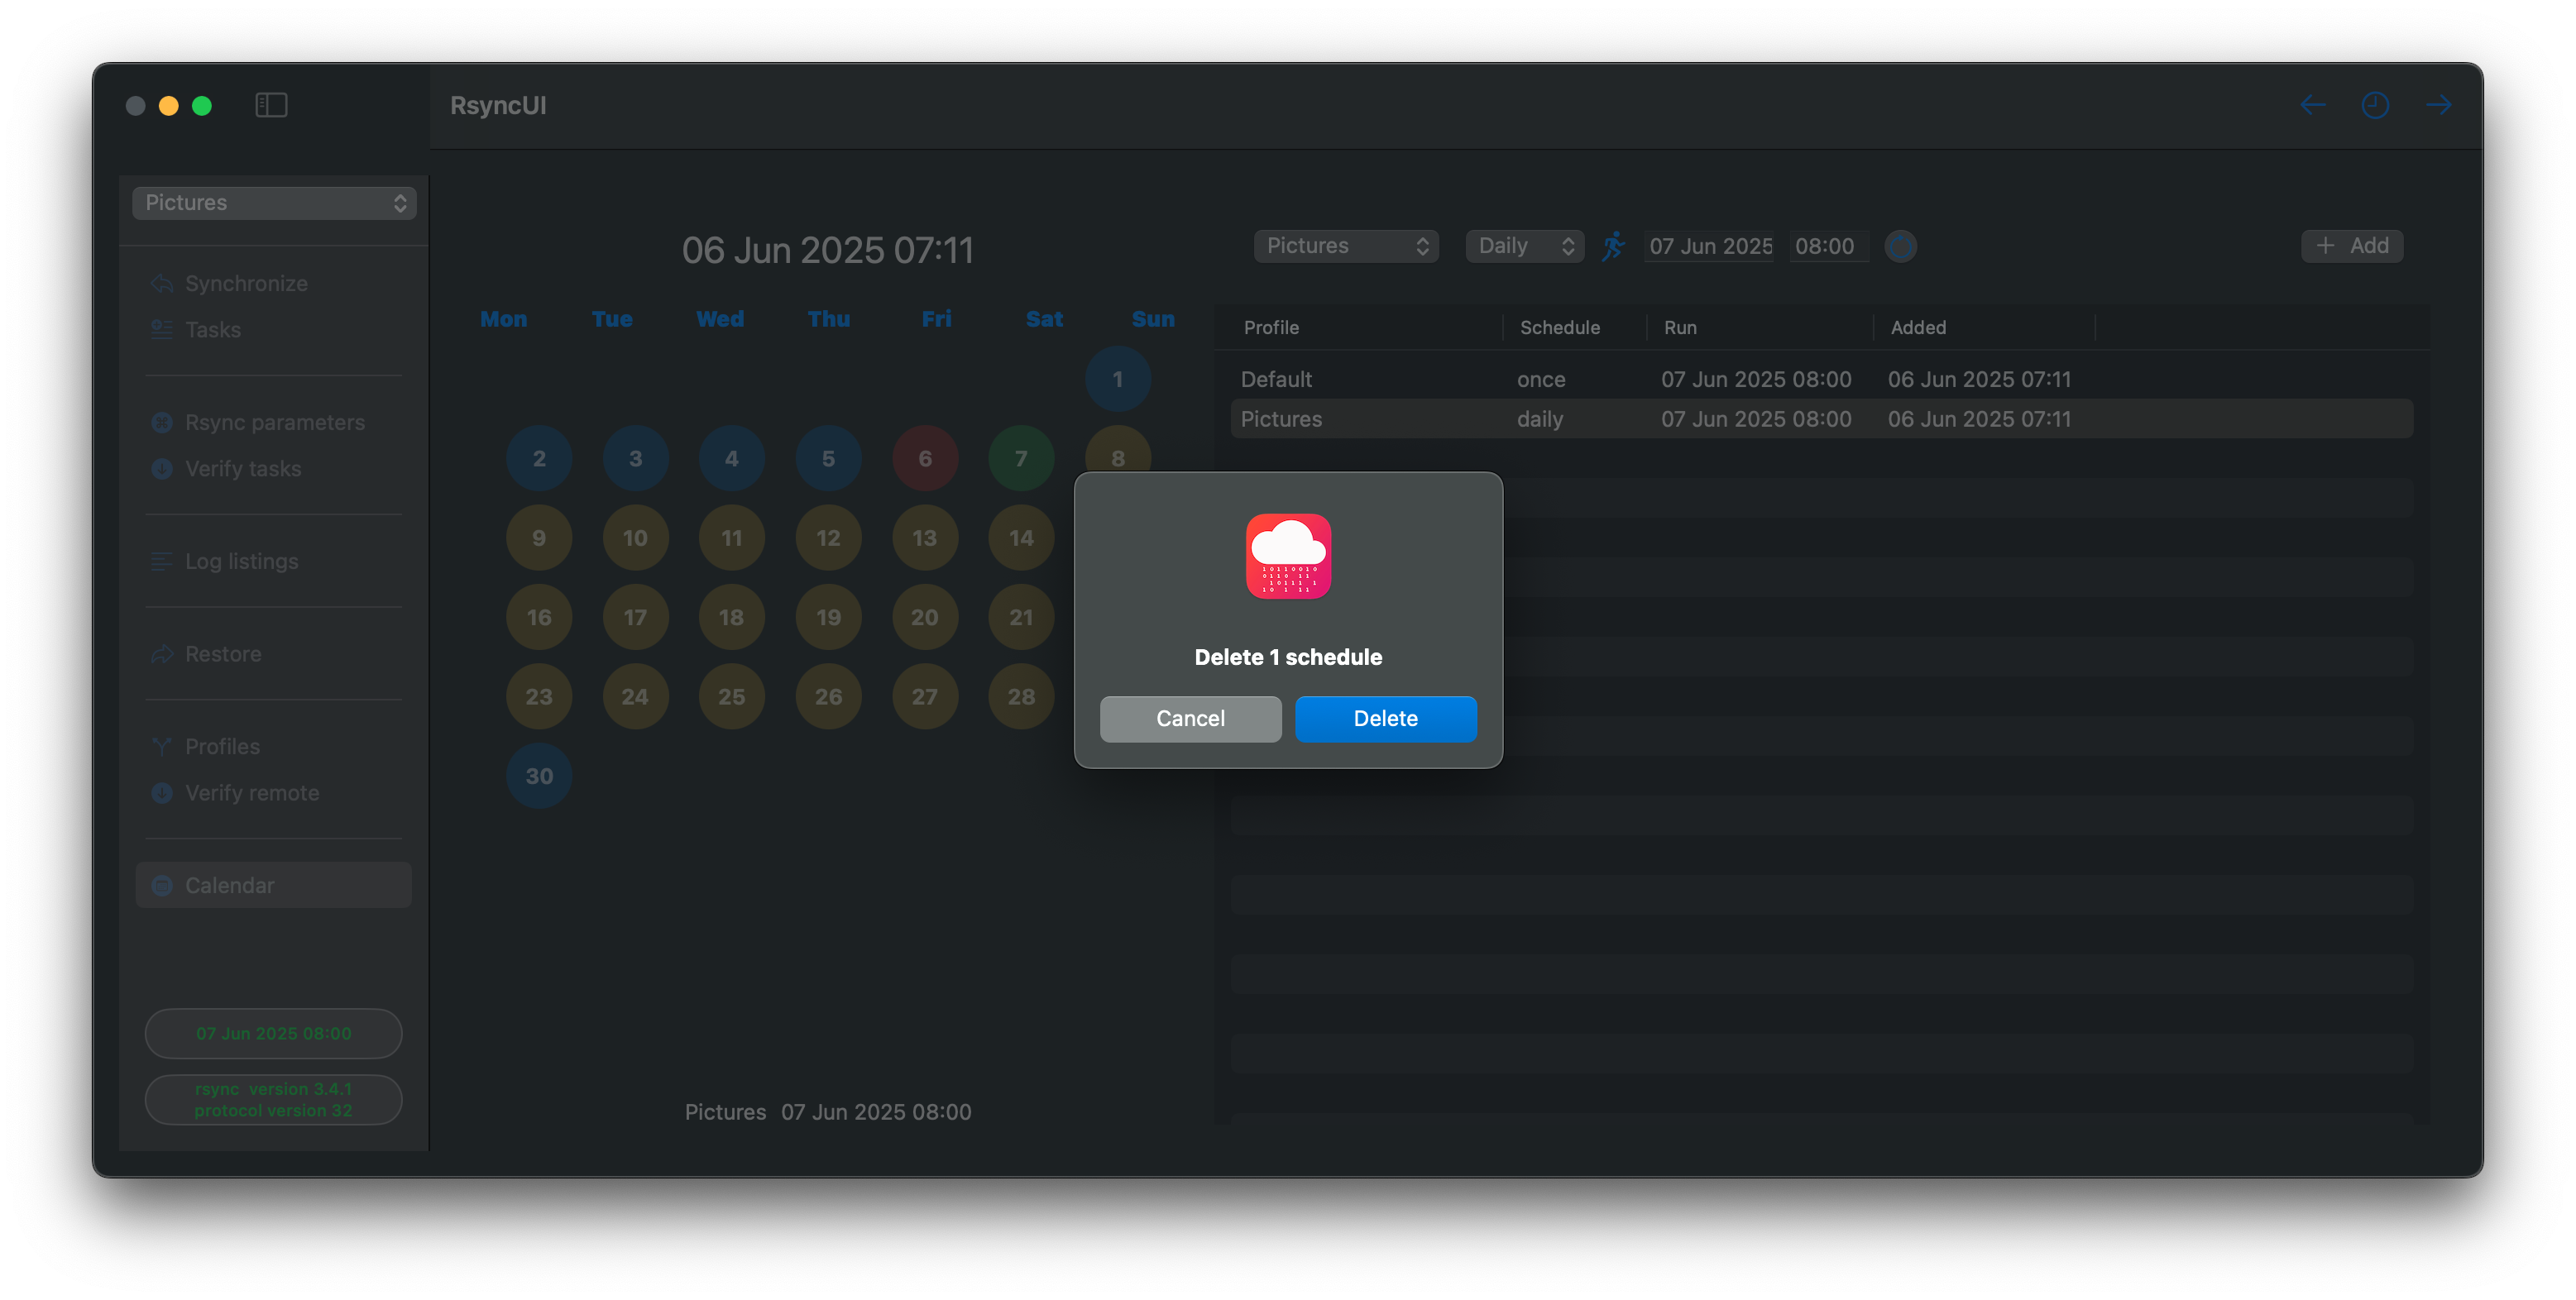
Delete Schedules
Select one or more schedules and press the backspace key.
5 - Profiles
Tasks can be organized into profiles. A profile is a named directory where RsyncUI stores its files.
When you create a profile (for example, newprofile), RsyncUI creates a new directory at:
$HOME/.rsyncosx/<macserialnumber>/newprofile
where <macserialnumber> is your Mac’s serial number. All tasks and log files for that profile are stored within this directory.
Why use profiles?
Profiles are useful for separating unrelated sets of tasks — for example, one profile for work backups and another for personal photos. Switching profiles loads only the tasks for that profile, keeping the task list focused.
Creating and switching profiles
Open the profile picker from the toolbar or the File menu. Enter a name and confirm to create a new profile. Selecting an existing profile loads its tasks immediately.
Stale task indicator
The list on the right shows tasks not updated within the number of days set under “Mark days after” in Settings. Tasks older than that threshold are highlighted in red as a reminder to run them.
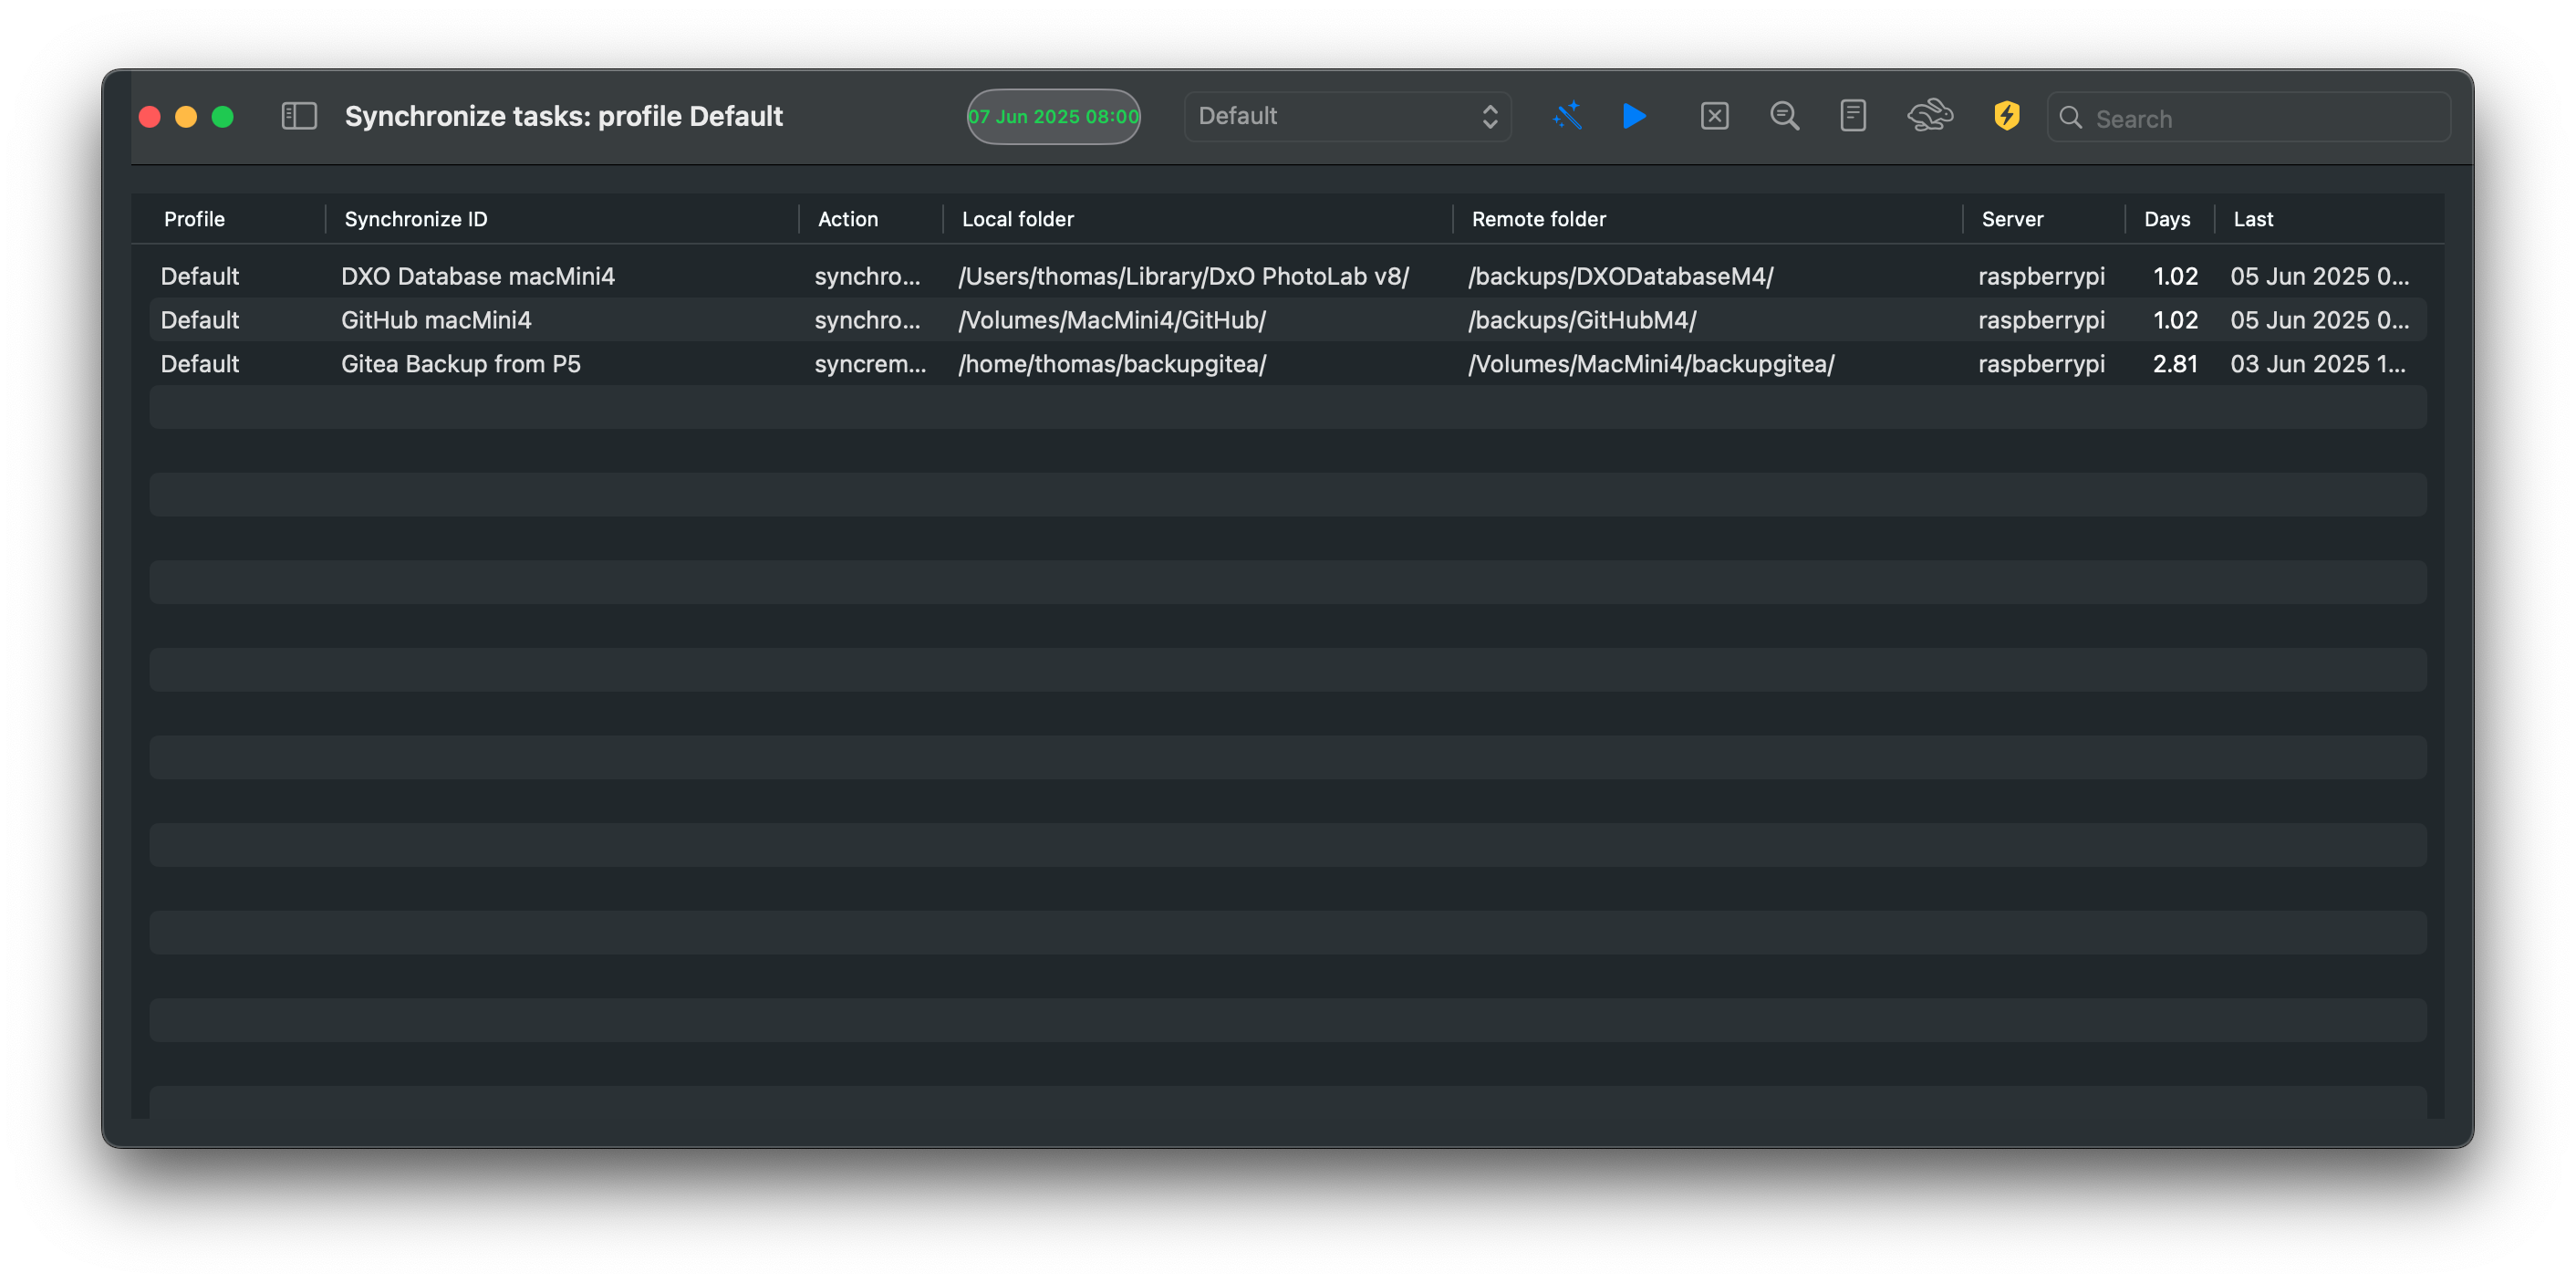
6 - QuickTask
Use QuickTask to quickly copy or transfer files. QuickTask remembers the last task as defaults; you can clear them via the toolbar. QuickTask works only with remote servers and requires passwordless SSH login.
There are two types of quick tasks:
- synchronize - synchronize local files to remote (push data)
- syncremote - synchronize remote files to local (pull data)
Trailing Slash Options
- Add - adds a trailing slash to both the source and destination
- Do not add - does not add a trailing slash, or if added, removes it
- Do not check - does not check for a trailing slash on either the source or destination
After entering data, the default task is a --dry-run task. Inspect the result before executing the actual run.
Folder Parameters
- Source folder - required
- Destination folder - required
~expands to the remote home directory- you can also use the full path, depending on where the backup is stored on the remote
Remote Parameters
- Remote username - username for login to the remote server
- Remote server - either server name or IP address for the remote server
7 - Restore data
RsyncUI restores only from remote servers. For local attached volumes, use Finder. Always restore to a temporary path to avoid overwriting your original data.
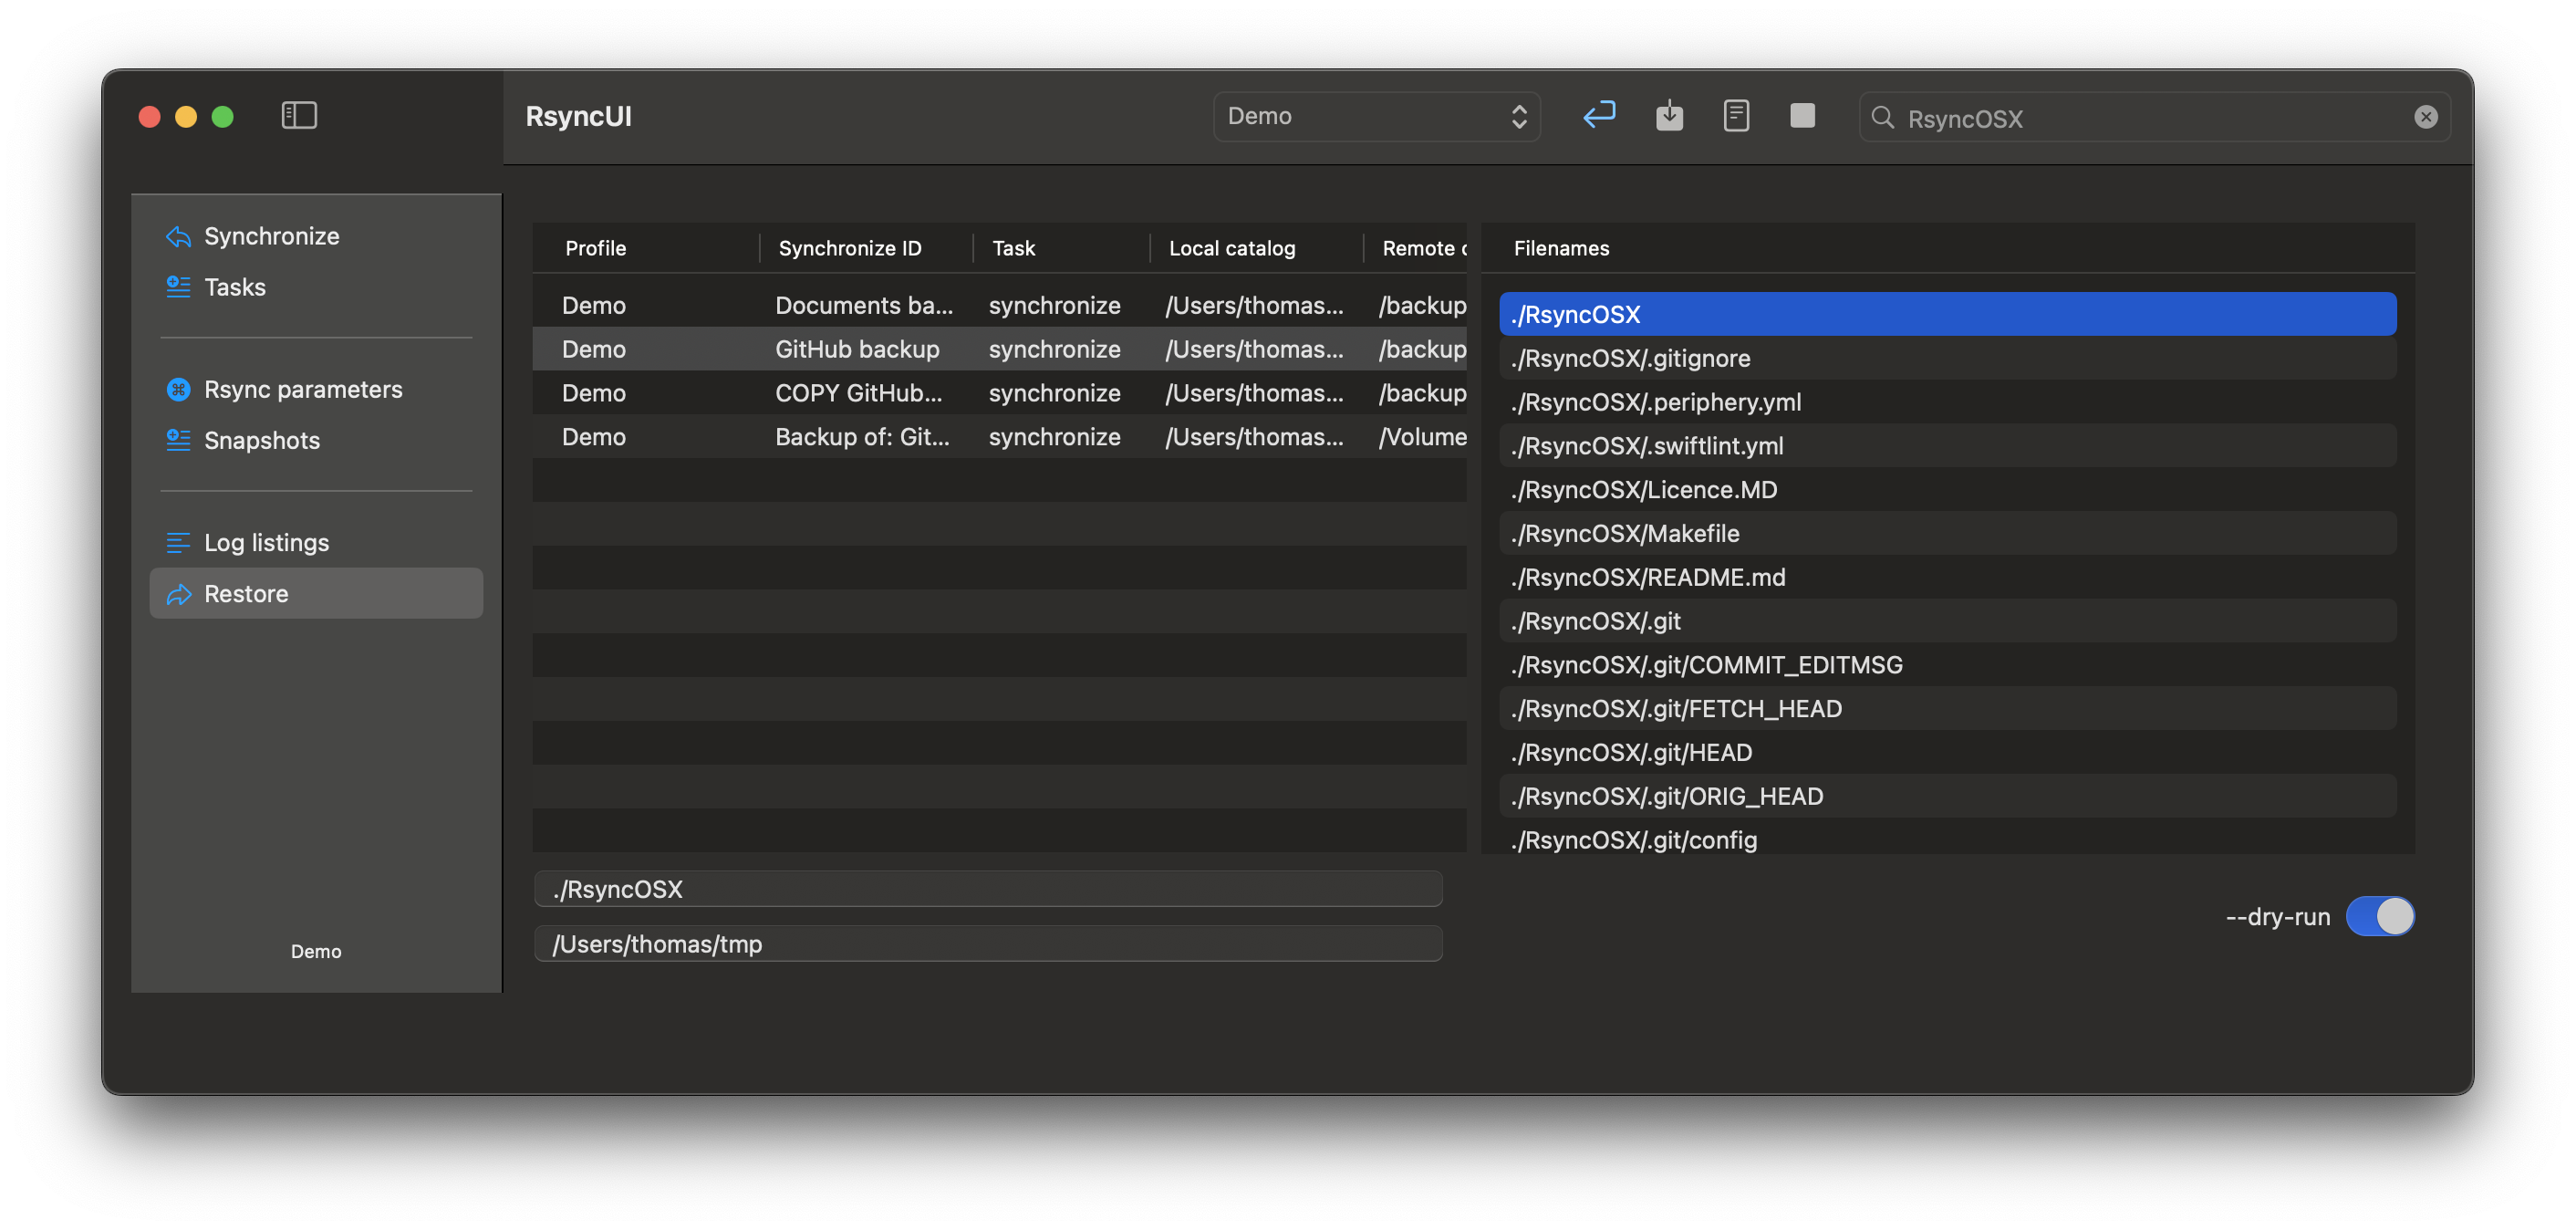
How to Restore Files
- Filter files: Use the filter field to search for files or directories. The filter shows only filenames containing the search string.
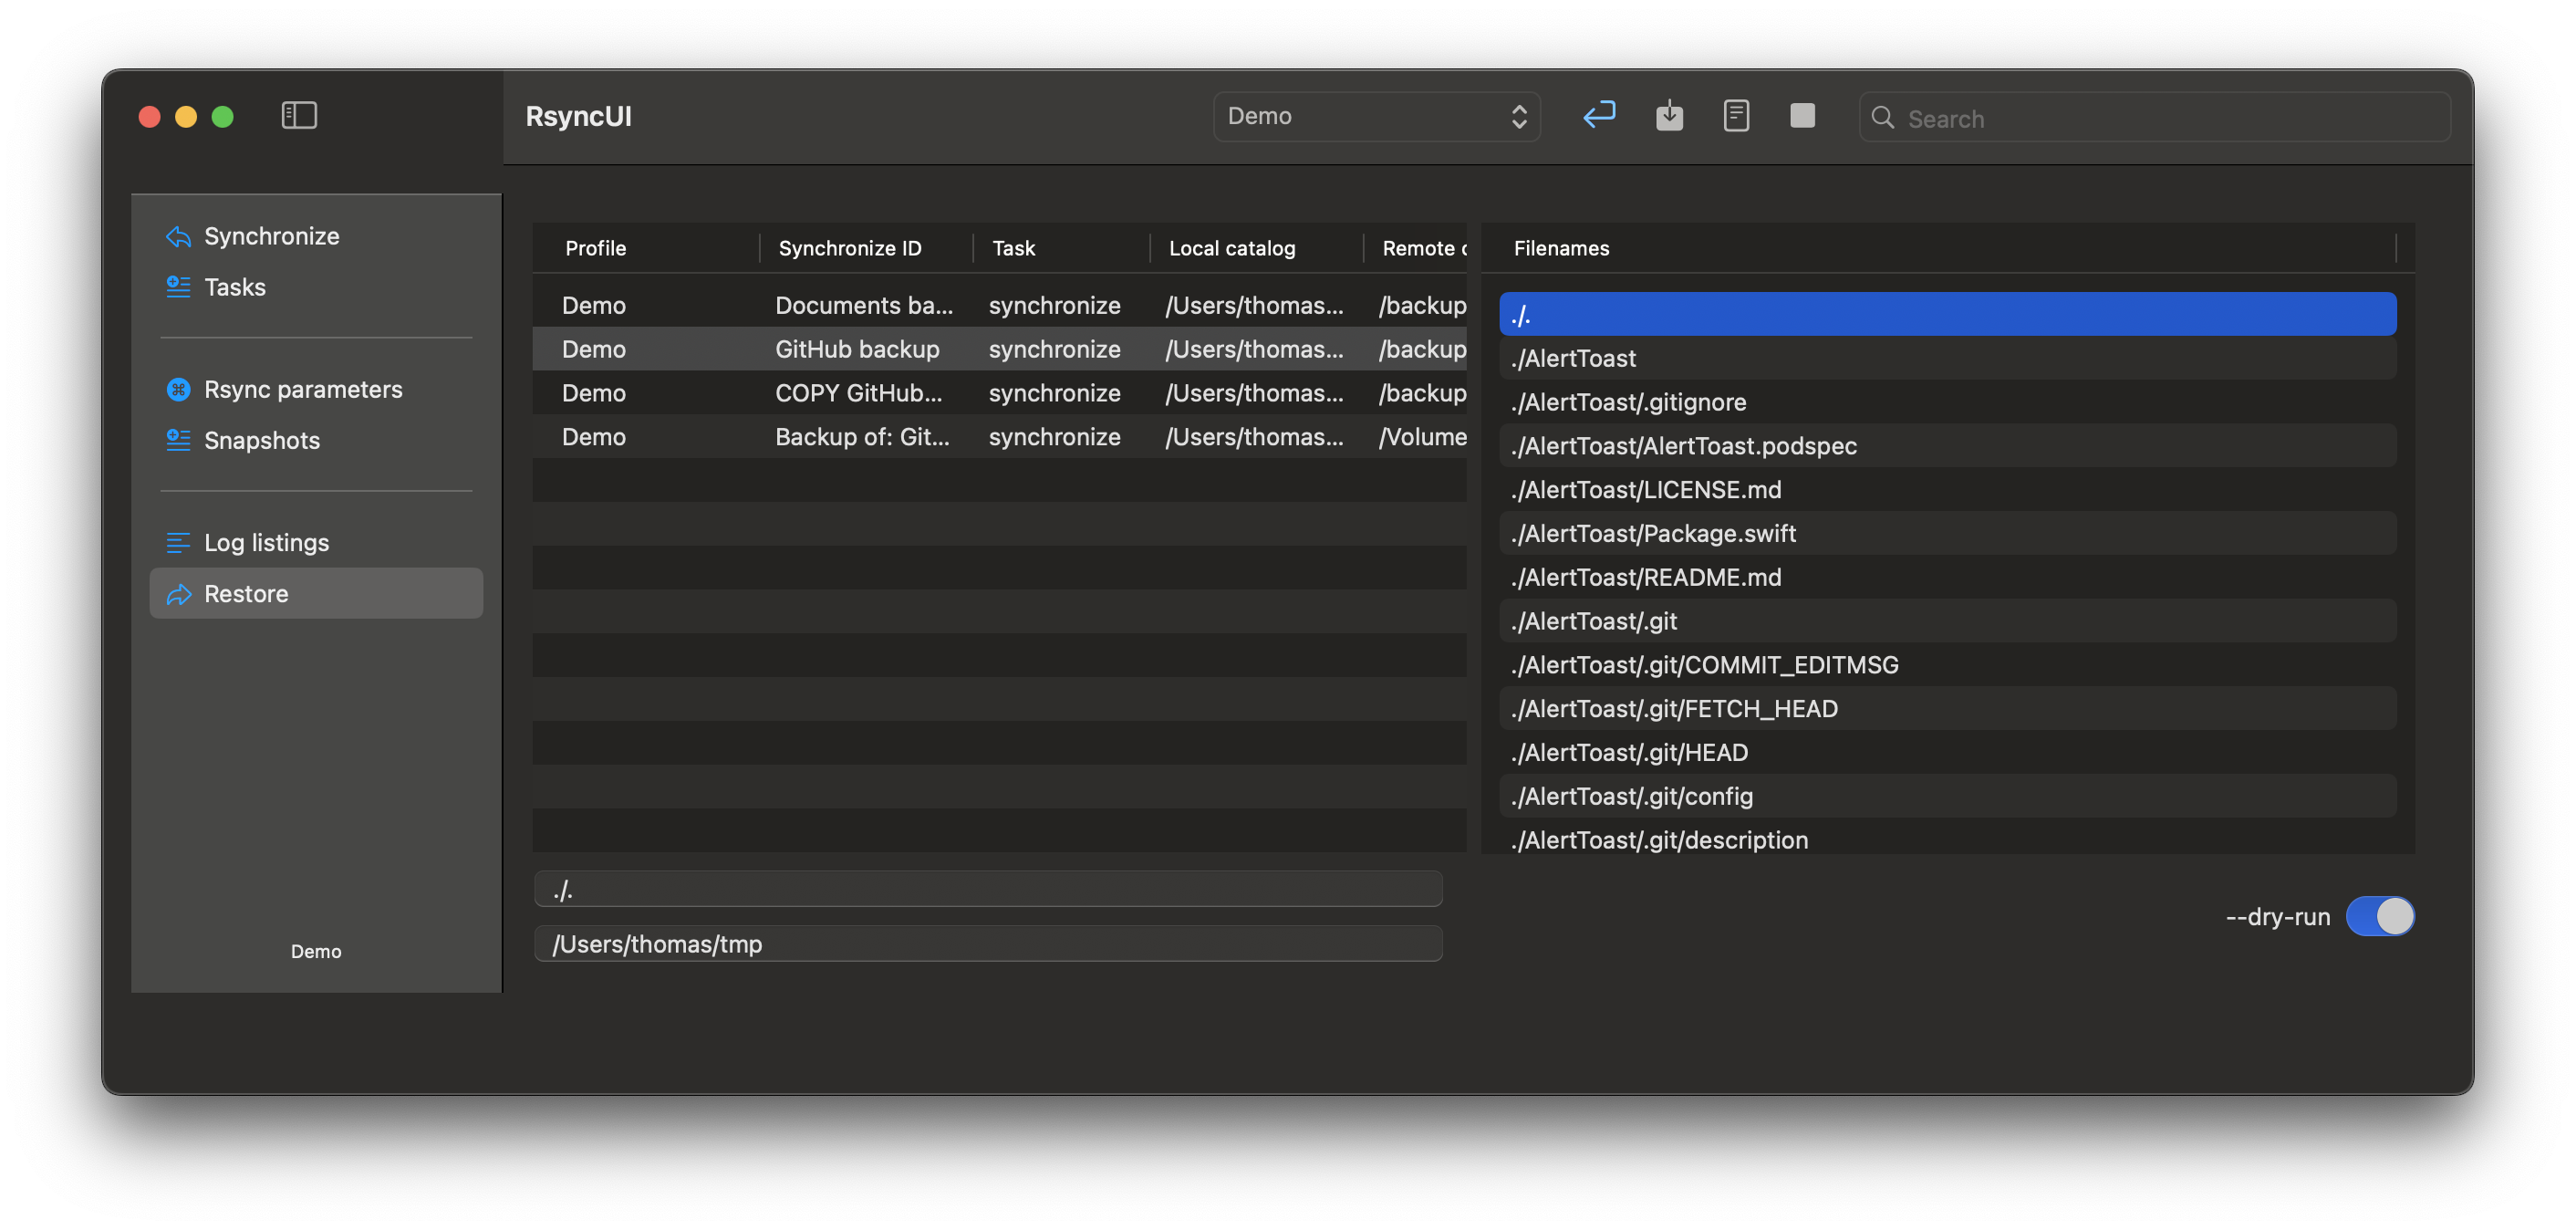
Select files: Choose either a file or a directory to restore.
View the command: Toggle the command switch to see the actual restore command that will be executed.
Preview the restore: Select restore to display a
--dry-runpreview of the restore operation.
- Execute the restore: Turn off the
--dry-runtoggle to perform the actual restore.
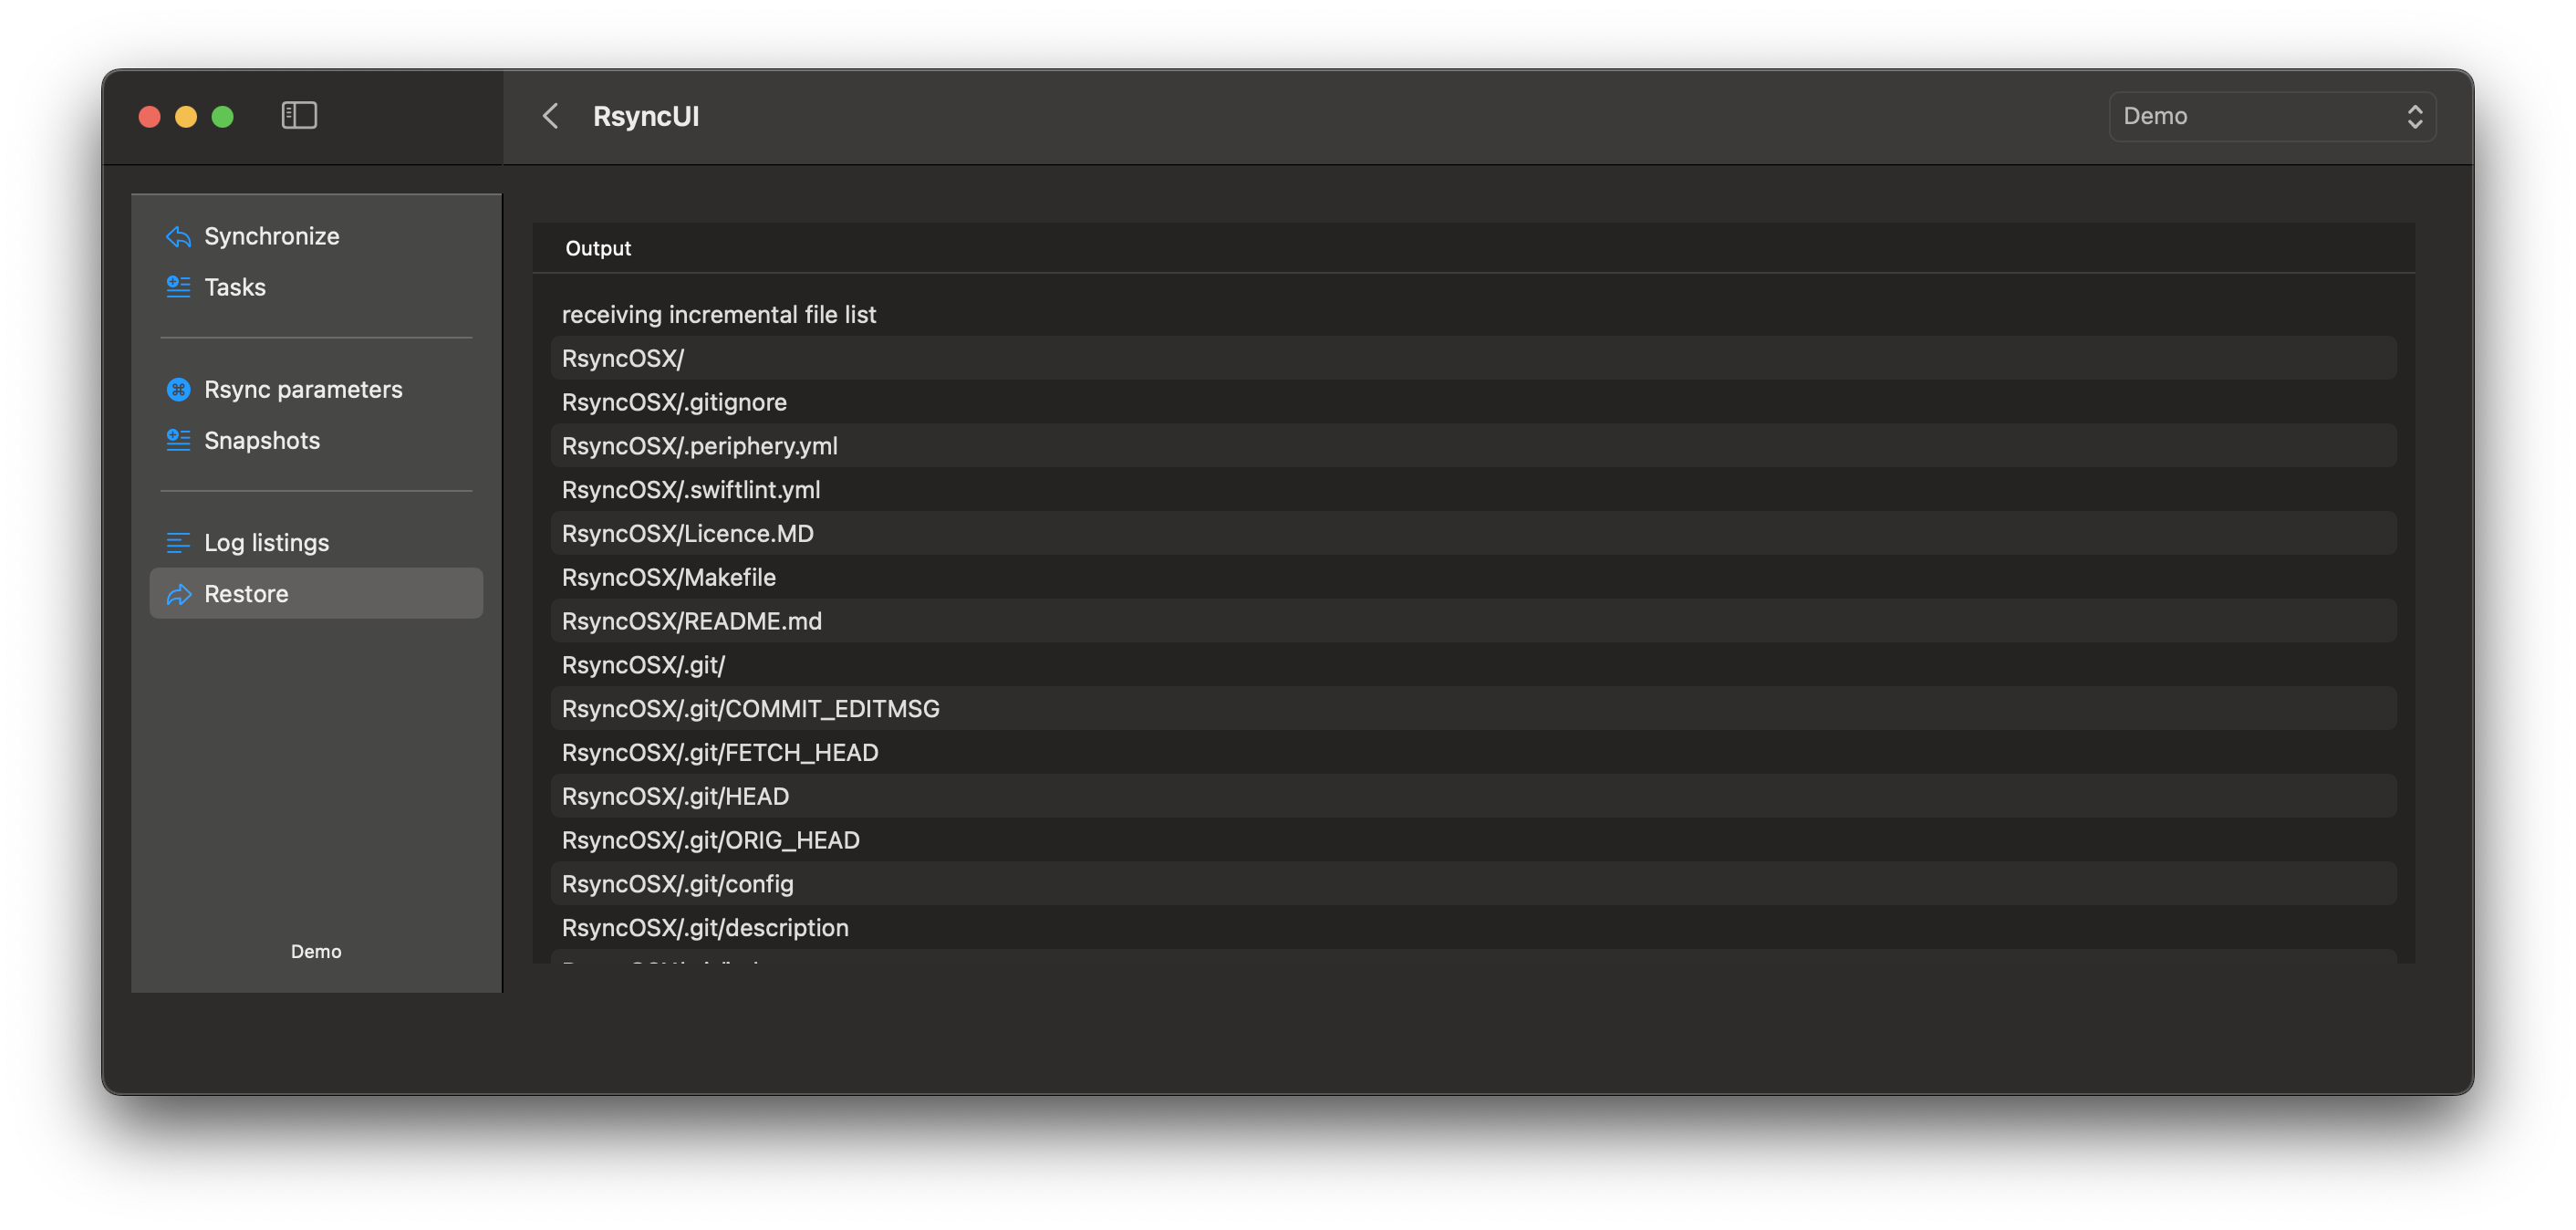
- Review results: After the restore completes, RsyncUI displays the output from rsync.